Hello Friends! Tiffany here with my first Creative Team project. When I think of the winter months, I think of snuggles and warm cuddles. There’s nothing better than snuggling up with a good book or snowy day cuddles with your family. The first glance of the Heart Shaker made my heart flutter. I knew the perfect picture for the heart. The Heart Shaker blended my love of cuddles and my love of crafting. This simple heart can really tell a tale of love and/or friendship! I love the natural look of the Heart Shaker. My favorite color is tan, so it was perfect for me directly out of the packaging. But I wanted to add a little something to it. I don’t paint nor use mixed media mediums, but I do LOVE to make paper flowers.
To get the project started, I decided I was going to ink the heart with my ink pads. This way you wouldn’t see any gaps in the flowers. I used an ink dauber and brushed the first layer on. Then I felt it was too light, so I pounced the second coat on.

")
While the ink was drying, I started to prep my flowers. You can use any flower punch, flower die, or scalloped circle for these flowers. I chose a scalloped circle punch that measures 1 ¼. You will need three scalloped circles for each flower. Next punched out the scalloped circles and laid them on the heart shaker to determine approximately how many flowers I would need to make. I ended up needing to make twelve flowers.
")
")
Once all of your layers are punched out, you need to slightly dampen the scalloped circles. I use a regular spray bottle filled with filtered water. The water helps break down the fibers in the cardstock and makes it easier to crumple. The water step is not mandatory, but it will prevent hand fatigue. Once you mist the cardstock crumple the scalloped circle like it is a piece of trash. After you have misted and crumpled several of the scalloped circles, you want to open them back up before they completely dry.
")
")
The more wrinkles equal a fluffier flower. Continue the process until all layers have been misted, crumpled, and smoothed back out. Layer 3 scalloped circles, slightly offset, and staple in the middle.
")
Crumple the layers around the staple, one layer at a time. Take your thumbs and slightly pull the layers back down into a flower shape.
")
")
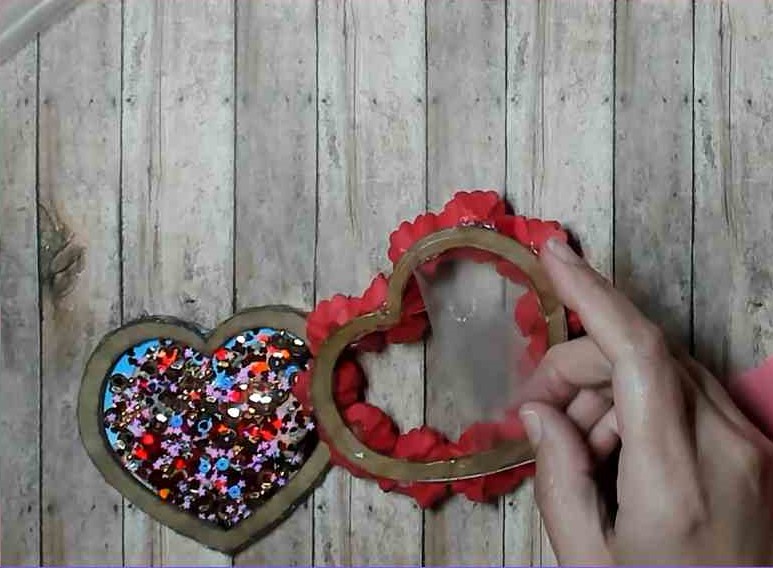
Glue the flowers around your shaker heart top frame. Add shimmer mist or glitter gel and let it completely dry.
")
")
Remove your protective film from the acrylic heart and glue to the flower frame. Glue your picture to the solid base heart.
")
")
")
Glue the two cut out hearts to the base. Add your shaker bits. Glue your acrylic flower frame piece to the top. You now have a beautiful keepsake shaker frame! ~Tiffany McGill
")


Leave a comment