Love is still in the air around here, and today I’m excited to share another sweet January project! For this post, I created the Mini Heart Album to hold photos of my husband and me through the years. As empty nesters, it’s been so meaningful to reflect on our journey together — and this album captures all of those moments in such a fun, heartfelt way. I absolutely adore how it turned out!
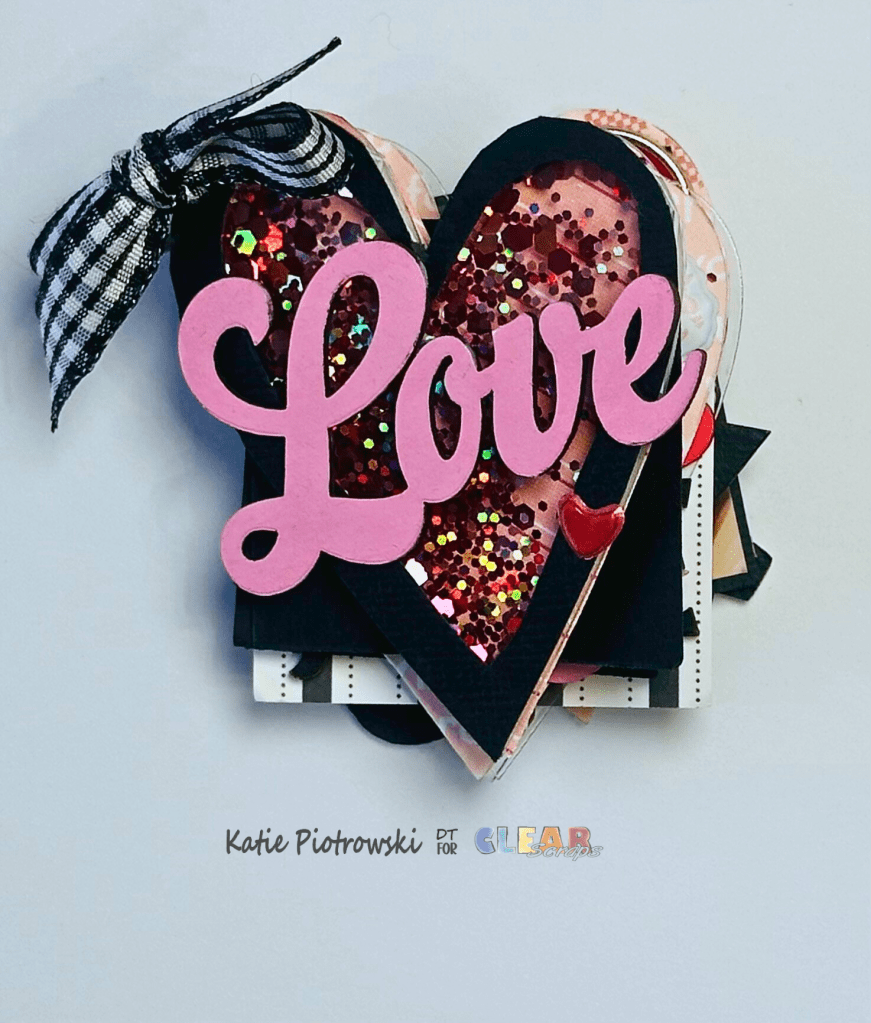
To start, I wanted the cover to feel extra special, so I turned the acrylic page into a shaker. I traced the outside edge of the heart, then freehanded a smaller inside shape and carefully cut it out with a craft knife. After lining the opening with thin foam strips and adding a sprinkle of glitter, I sealed it with the outline piece I created. A tiny epoxy heart completed the look perfectly.
For the first page, I adhered a double-sided patterned paper to the back of the cover. This allows the back of the paper to show through the shaker window underneath the glitter — such a fun effect! Next, I trimmed a photo, added a small mat, and adhered it to the page. A puffy embellishment and brad added the perfect little touches to finish it off.
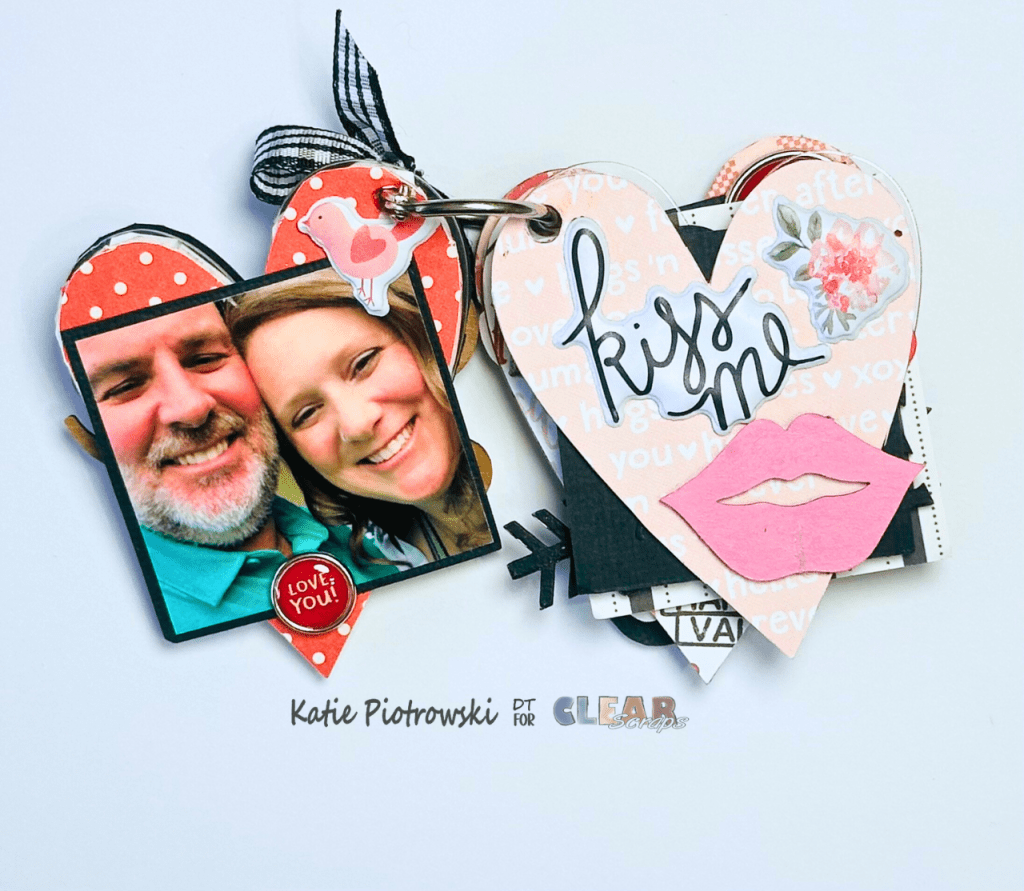
I began the next page the same way, by adding patterned paper to the acrylic base. I layered on a puffy “kiss me” sentiment and a floral sticker. Then I colored the chipboard lips from the Love Embellishments Chipboard Punchout set and adhered them, so they slightly overhang the right edge of the page. I love the playful movement it adds!
On the backside of this page, I added more patterned paper and topped it with another matted photo. A few enamel dots, a brad, and a puffy heart sticker finished the page nicely while keeping everything cohesive.
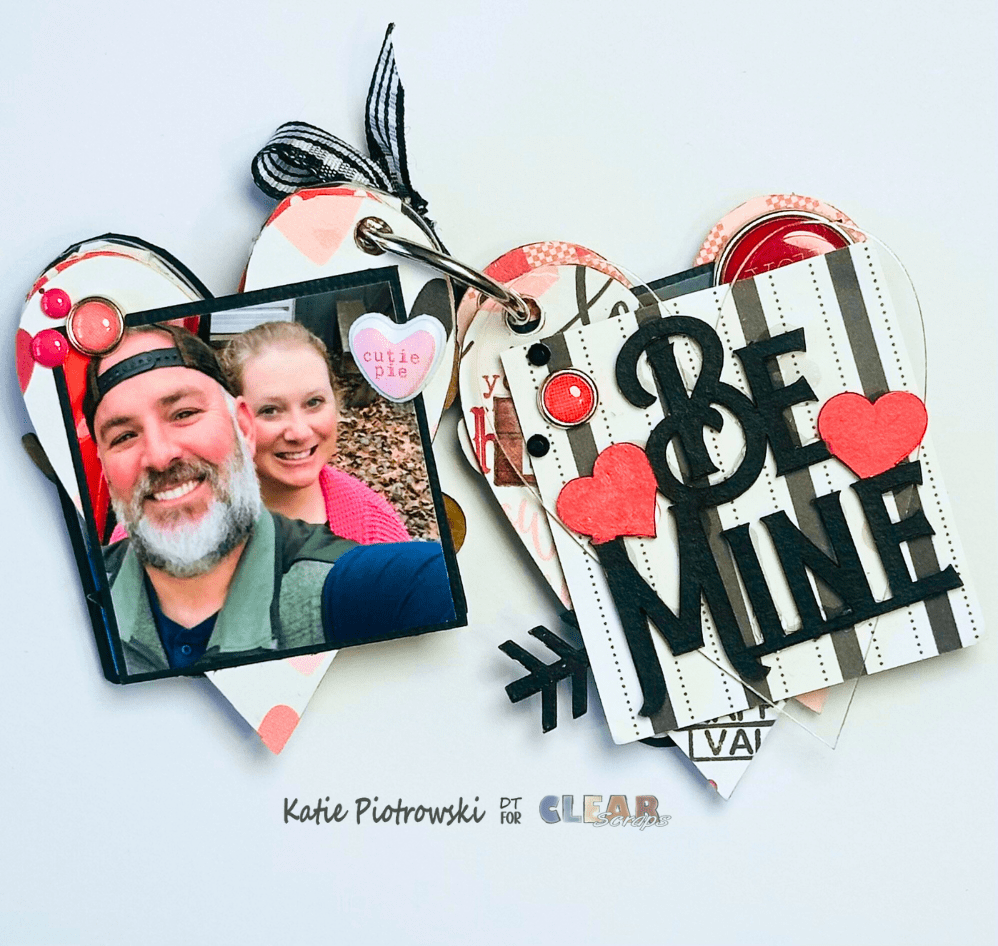
For the next page, I decided to leave the acrylic uncovered so the clear layer becomes part of the design. I colored the “Be Mine” chipboard piece from the Love Punchout and adhered it directly to the acrylic.
On the backside, I kept things simple with a single matted photo. To ensure that no adhesive showed through on the front, I applied glue only behind the chipboard letters — just enough to hold the photo firmly while preserving the transparency effect.
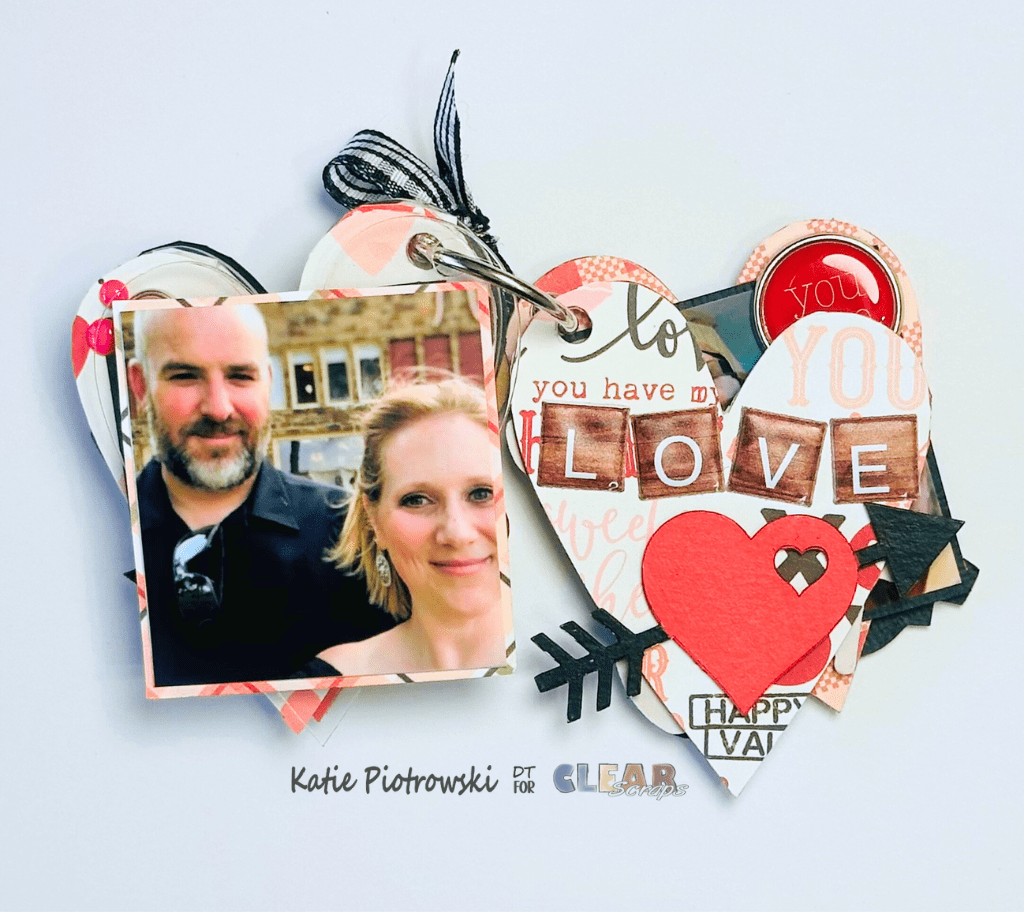
The following page is covered with patterned paper, then embellished with the chipboard heart-and-arrow from the Love Punchout, plus puffy stickers that spell LOVE. The mix of textures adds so much charm.
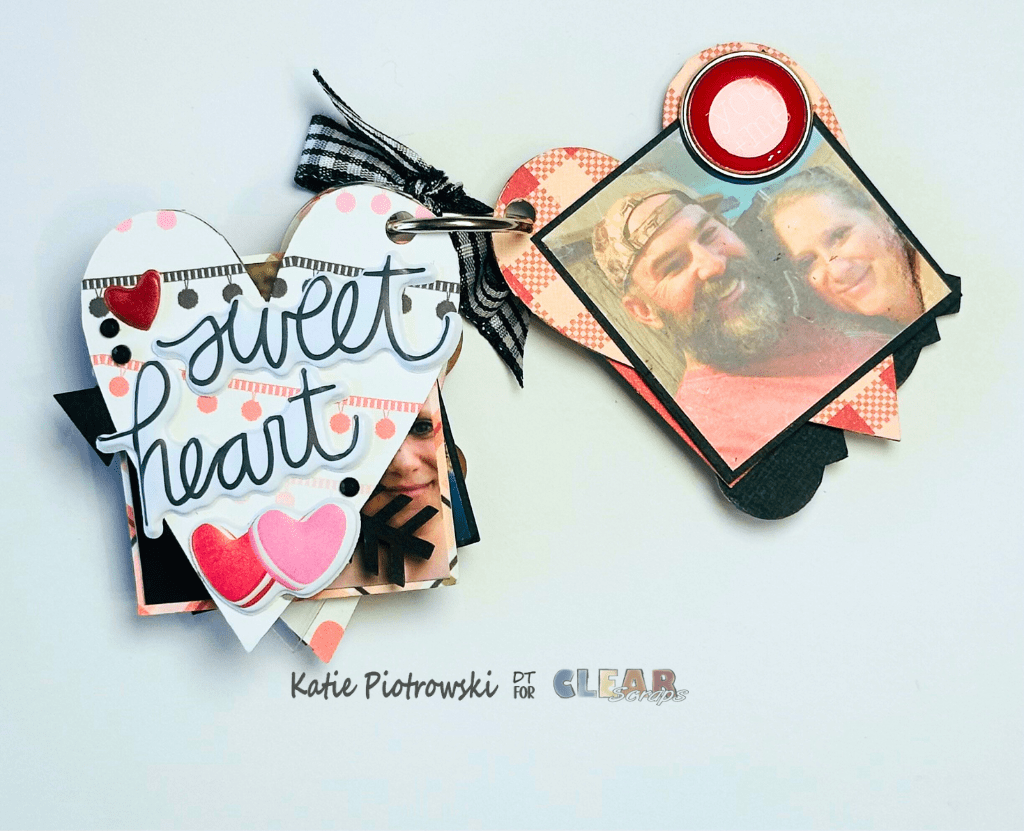
To keep the pages cohesive, I mirrored the design approach on the next page: coordinating patterned background, puffy “sweet heart” stickers, and clean lines for the photo mat. For the next spread, I repeated the formula—paper, matted photo, and a single bold embellishment—this time topping it off with a large brad that reads “you + me.”
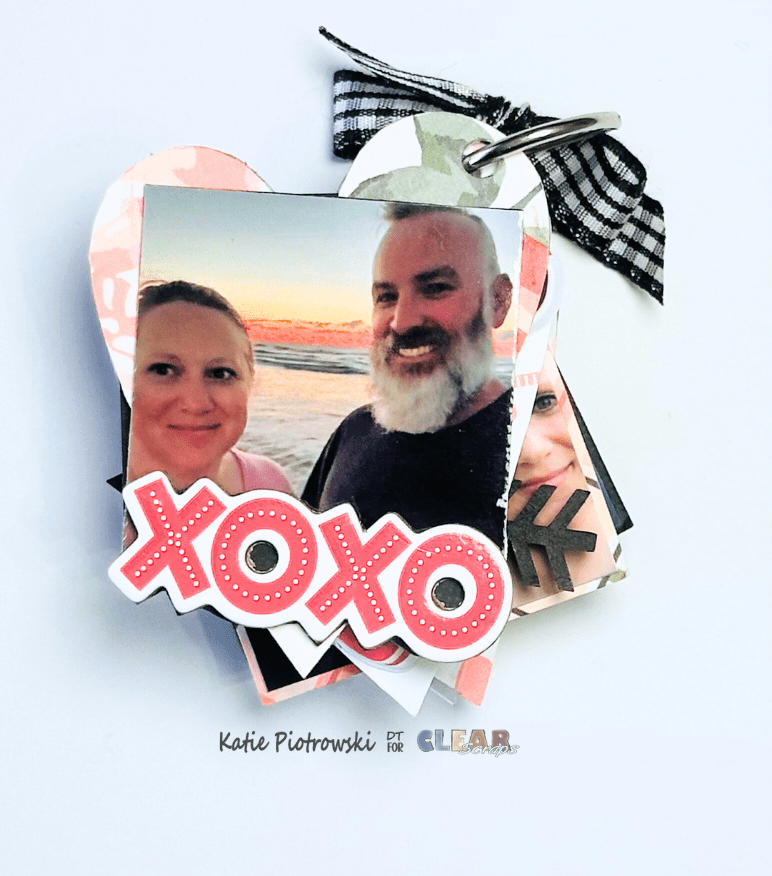
For the final page, I placed the photo directly onto the patterned paper without a mat to keep the focus on the picture itself. I added the XOXO chipboard embellishment to complete the page and tie the whole album together.
I truly love the way this little album turned out. It’s sweet, simple, meaningful, and the perfect place to capture photos of my husband and me throughout the years. I can’t wait to fill it with even more memories.
Clear Scraps Products Used:
Mini Heart Albumhttps://www.clearscraps.com/product_p/csmnhrt.htm
Love Embellishments Chipboard Punchout
If you’re inspired to create your own love-themed mini album, the Clear Scraps Mini Heart Album is such a fun starting point — and the creative possibilities are endless!
If you make one, be sure to share it and tag me… I’d love to see your beautiful creations!
Happy Crafting,
Katie


Leave a comment