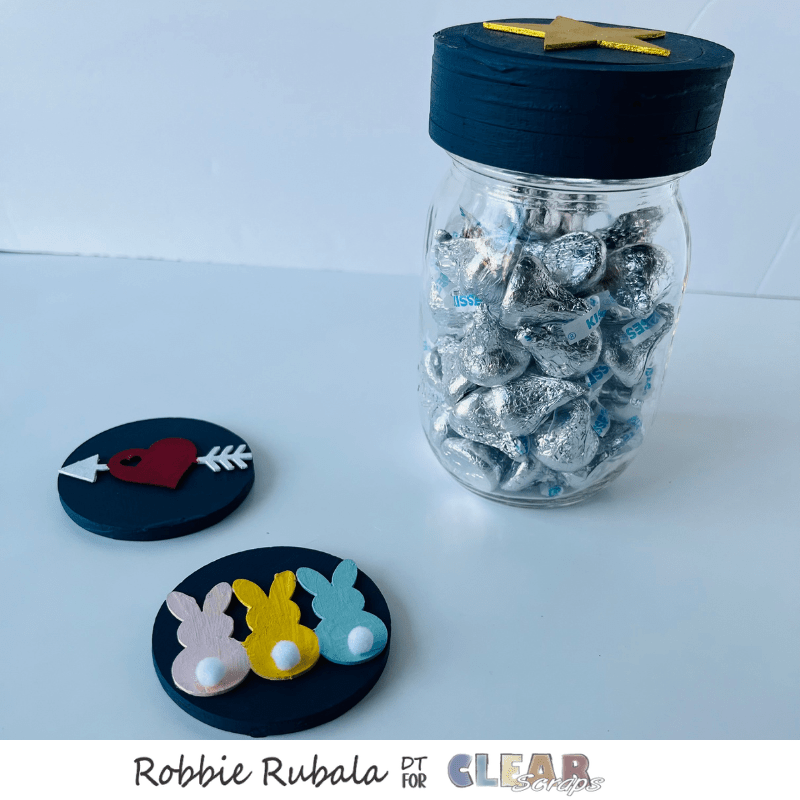
Clear Scraps Mason Jar wooden covers treat holder
I love having treats on my craft table for the ladies who come to my classes. When I saw the Mason Jar wooden covers I knew I wanted to make one. Here is what I made.
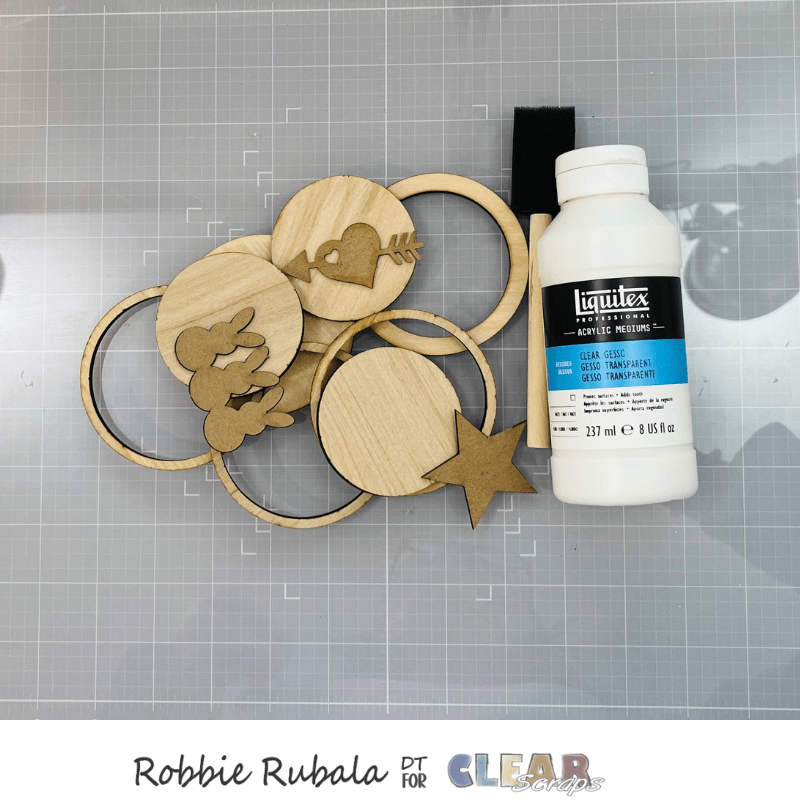
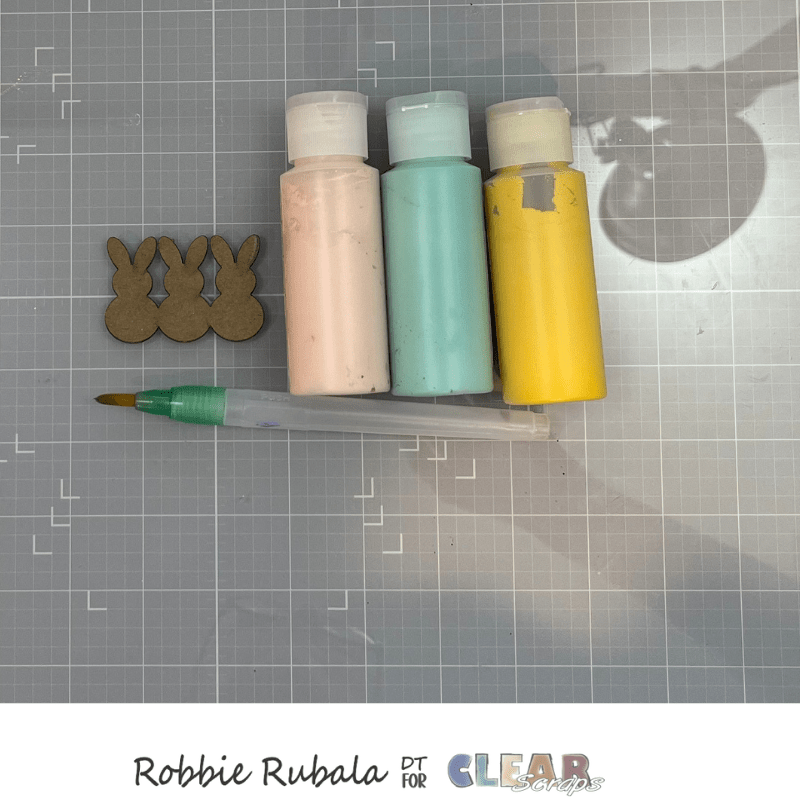
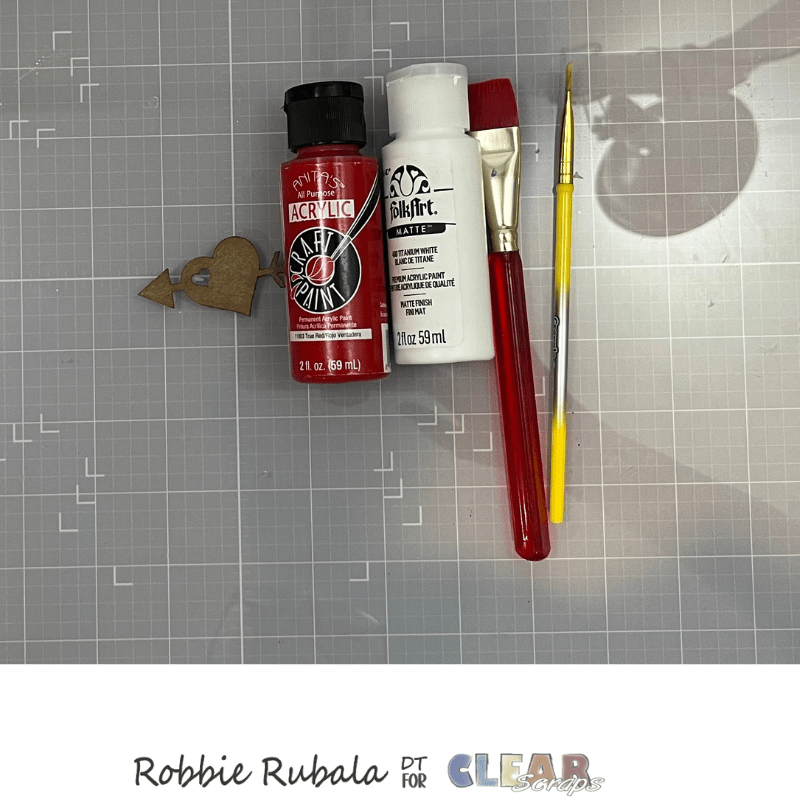
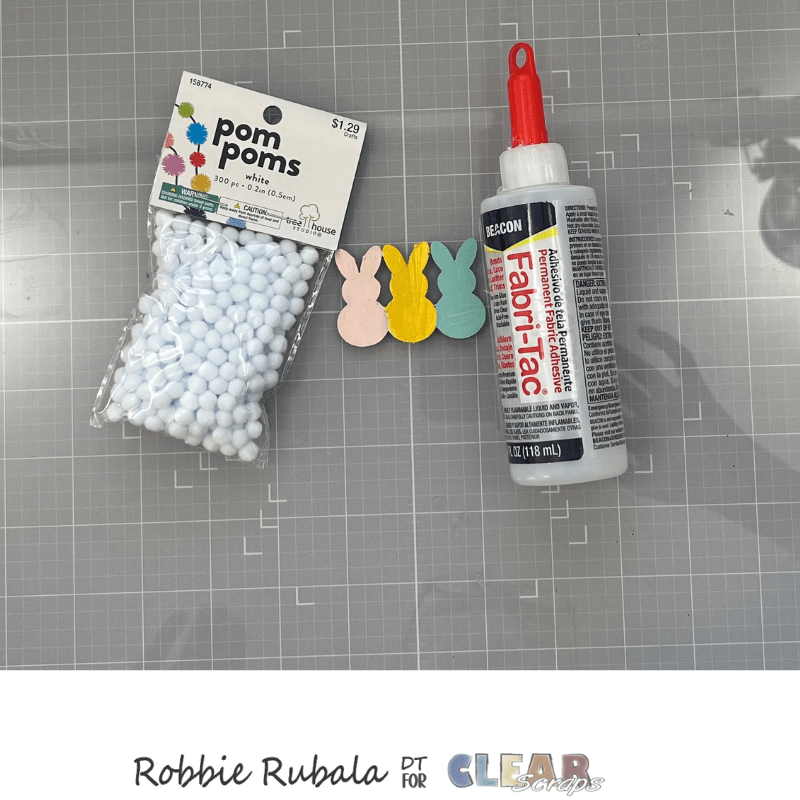
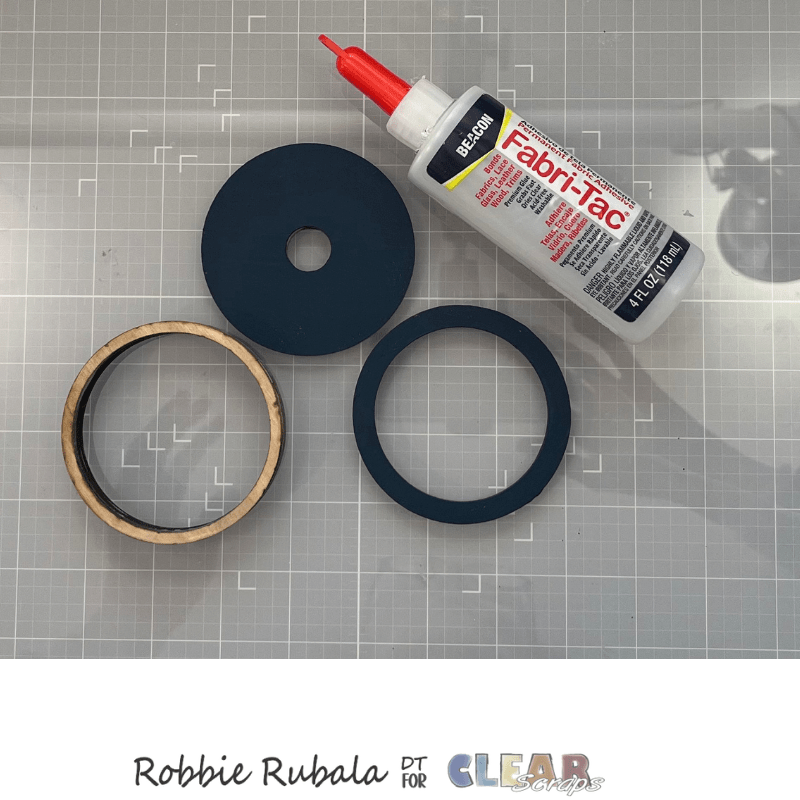
To make this project you will need Mason Jar wooden covers, Faith embellishment chipboard punch outs, Love embellishment chipboard punch outs, Multi Stars chipboard embellishments, Navy – pink – yellow – teal – red – white acrylic paint, gold paint, Gesso, mini pompoms, strong glue, and paintbrushes.
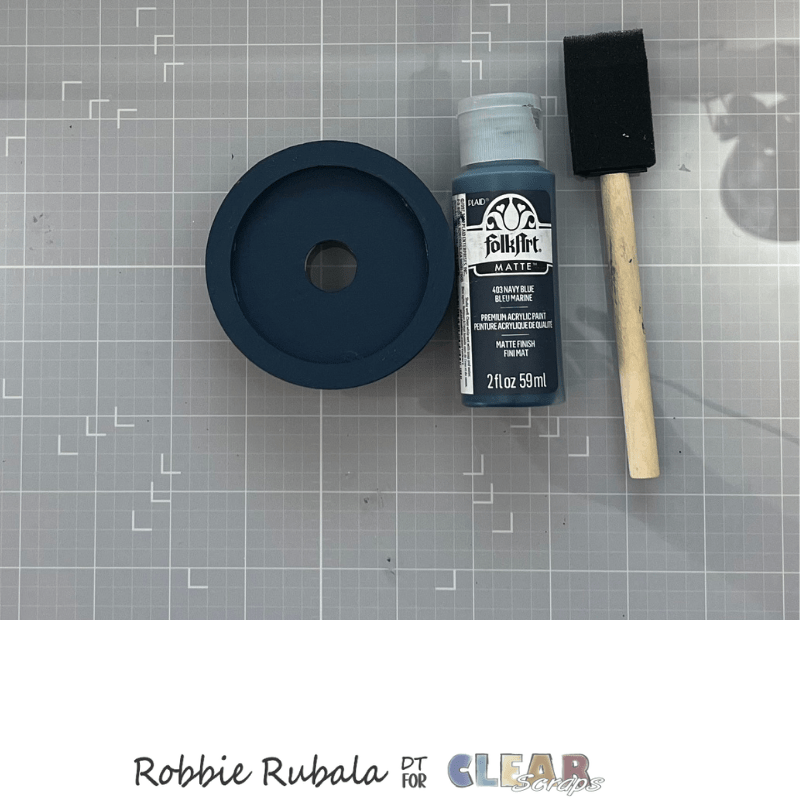
Take all the wood pieces and the gesso and add a coating to prevent the paint from soaking into the wood.
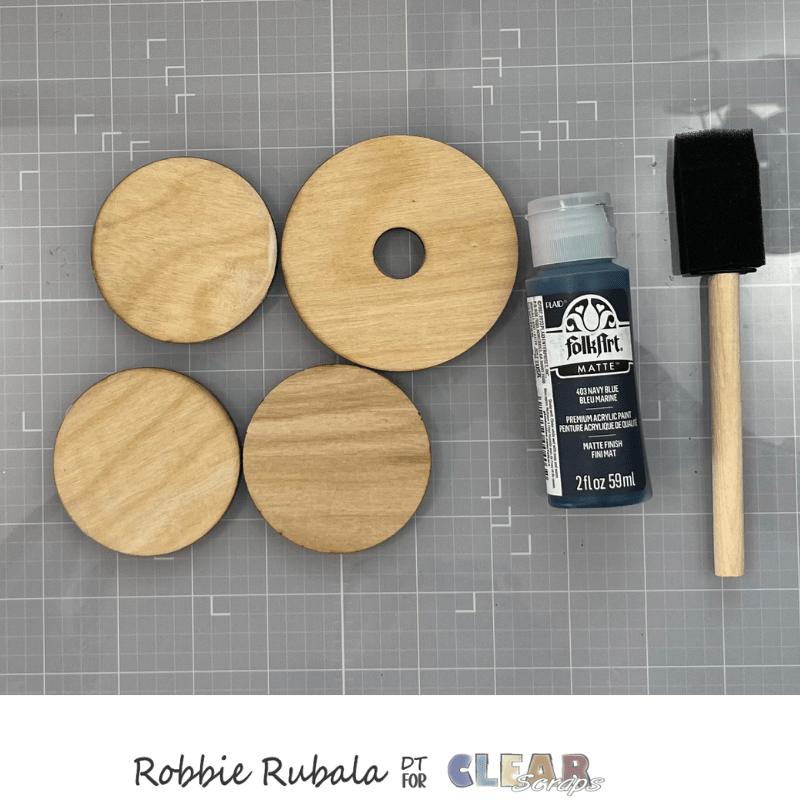
When the gesso is dry take the mason jar round circles, navy paint, and paint brush and paint both sides of the circles with the navy paint. Let dry completely.
While the circles are drying, take the rings and a strong glue. Glue them together. Set aside to dry.

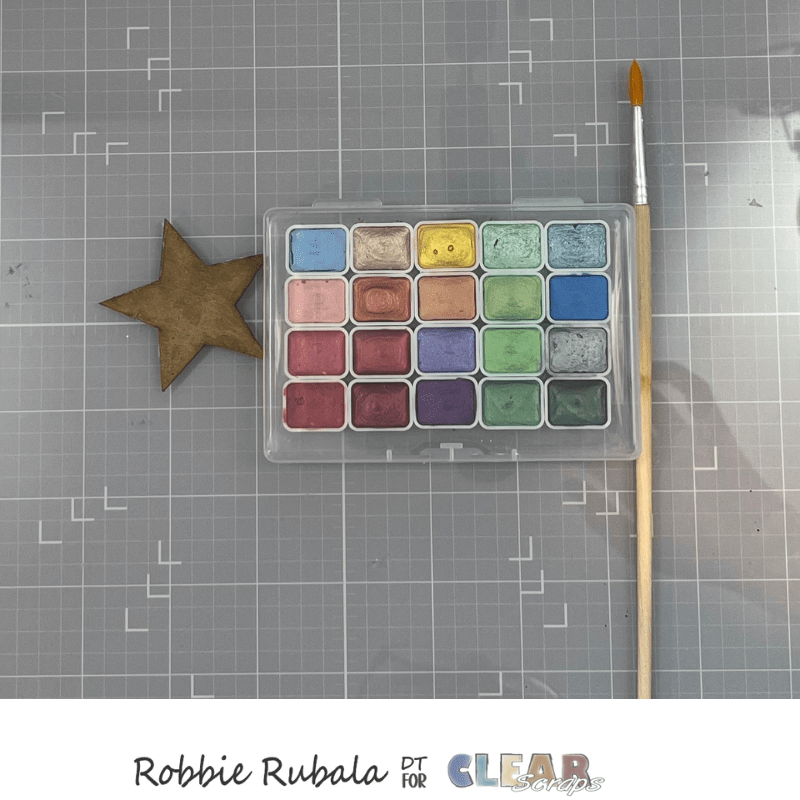
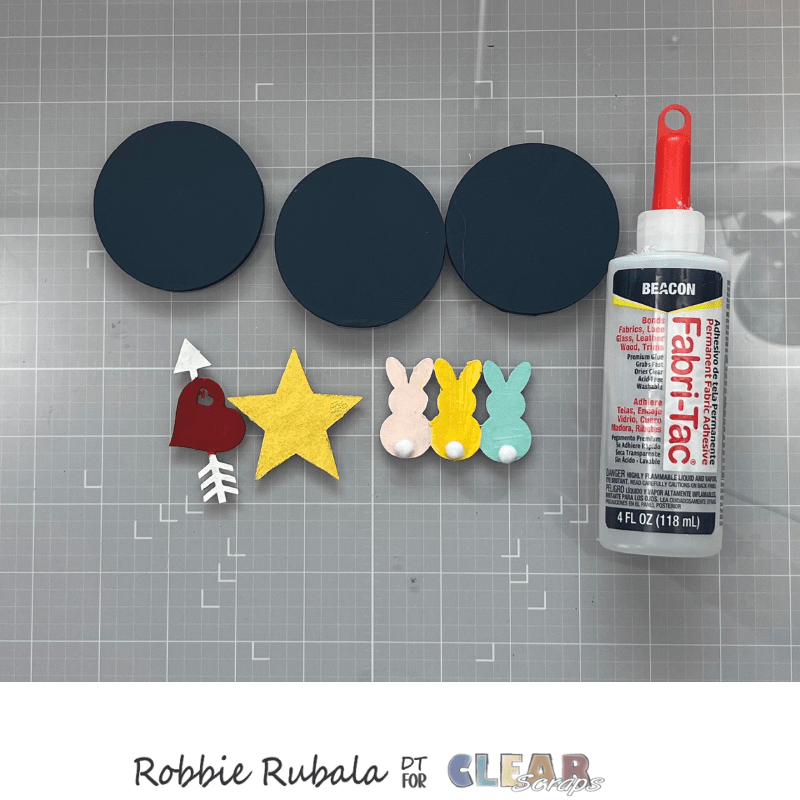
Take the smallest solid star and the gold paint. Paint the star on top and sides. You may need to apply 2 coats of paint if it does not cover well.
Use the pink, yellow, and teal paint and paint the bunnies. Again it may take 2 coats of paint.
Use the white and red paint to paint the Valentine piece.
When the bunnies are dry use a strong glue and the pompoms to add them to the chipboard piece as their tails. Let dry.
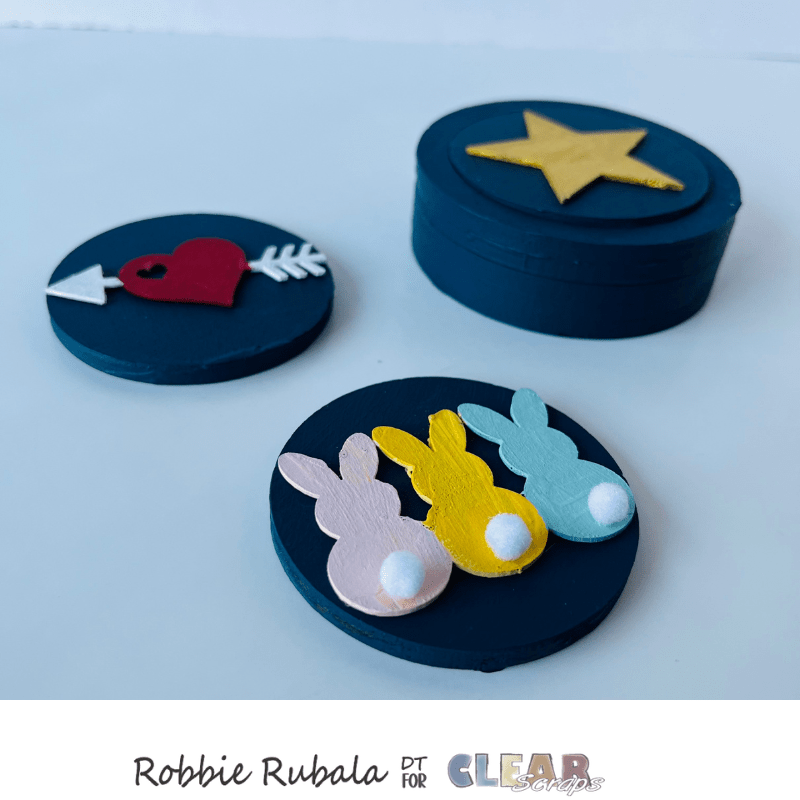
When the rings are dry, take the solid piece with a hole in it and the one ring you are using as the top and with a strong glue, glue them together. Let dry.
Take the ring holder and navy paint to paint the sides of the ring.
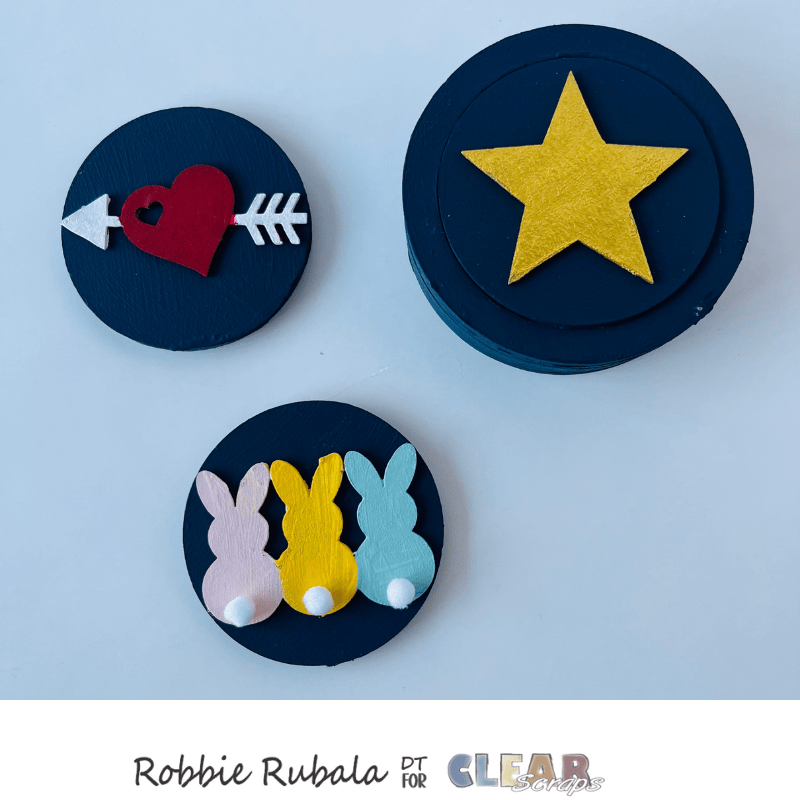
Take the chipboard shapes and the navy rounds and a strong glue. Glue the shapes onto the rounds making sure the shapes are inside the round and will not interfere with the ring holder.
Your mason jar wooden cover is now read to be used on a glass jar to hold your treats.
I can’t wait for the ladies to see the new treat holder. I am sure they will love it!
Have a great day!
Robbie


Leave a comment