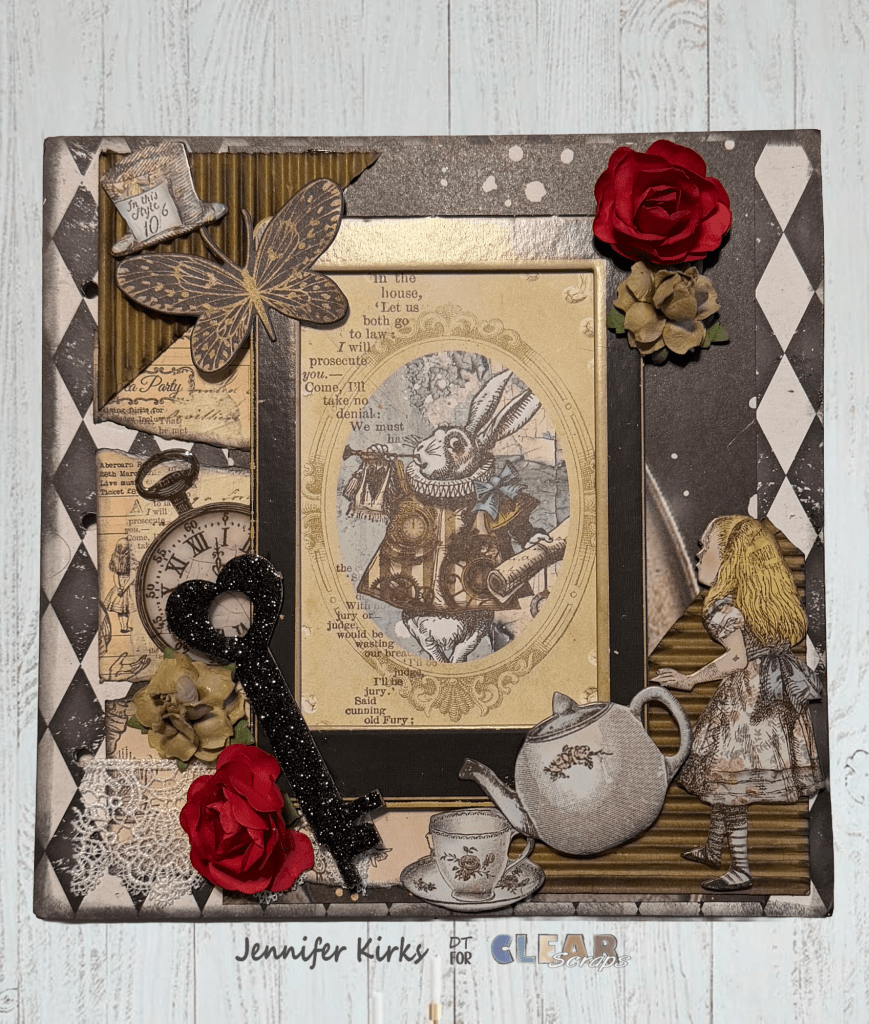
Hello crafty friends! Jennifer here on the blog, and today I’m sharing a whimsical 8×8 Alice in Wonderland chipboard album. For this project, I decided to wander a little further down the creative rabbit hole and try something different. Instead of sticking to just a few photo mats and pockets, I experimented with multiple fold-outs on several pages. It was such a fun challenge learning new folding techniques and discovering how much extra space they create for photos, journaling, and interactive elements.
If you’ve never tried fold-outs before, they’re a wonderful way to stretch the possibilities of a smaller album. There are so many great tutorials on YouTube and creative journaling groups on Facebook that can inspire you. Even though this album only has five pages, the fold-outs allowed me to add plenty of room for pictures, tags, and little storytelling moments throughout.
To begin, I covered each piece of chipboard with patterned paper. After gluing the paper down, I used my trusty X-Acto knife to carefully trim around the edges. Before covering the back side, I punched the binding holes on one side first. This little step saves so much time later because it ensures the holes line up perfectly—you won’t have to hunt for them after everything is covered.

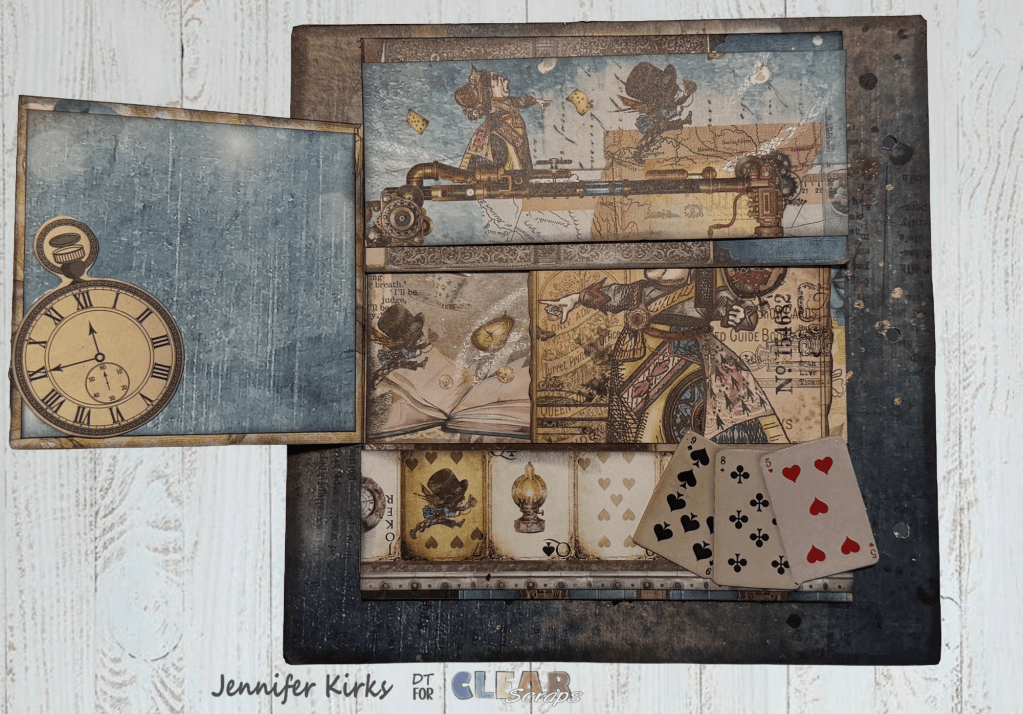
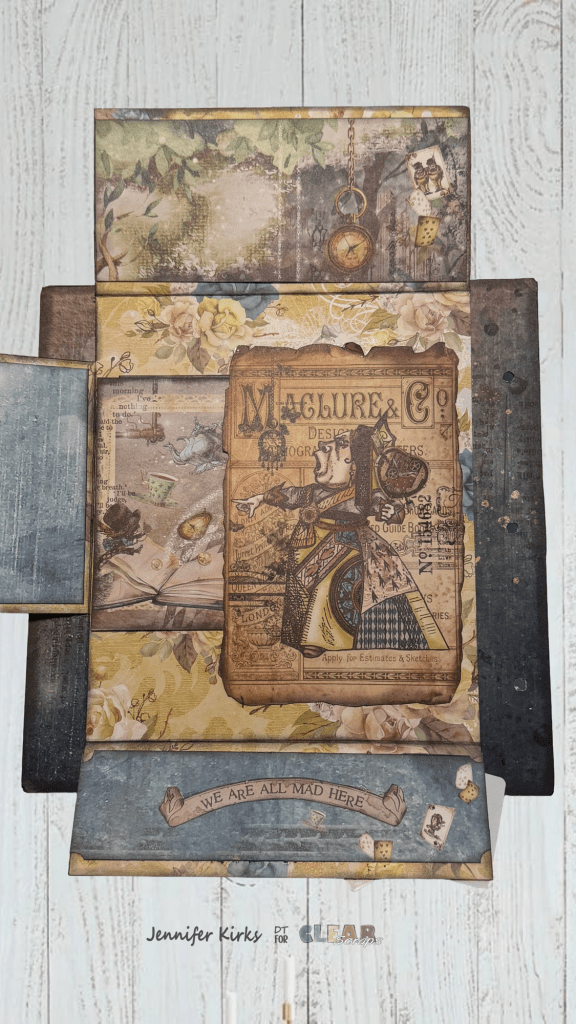
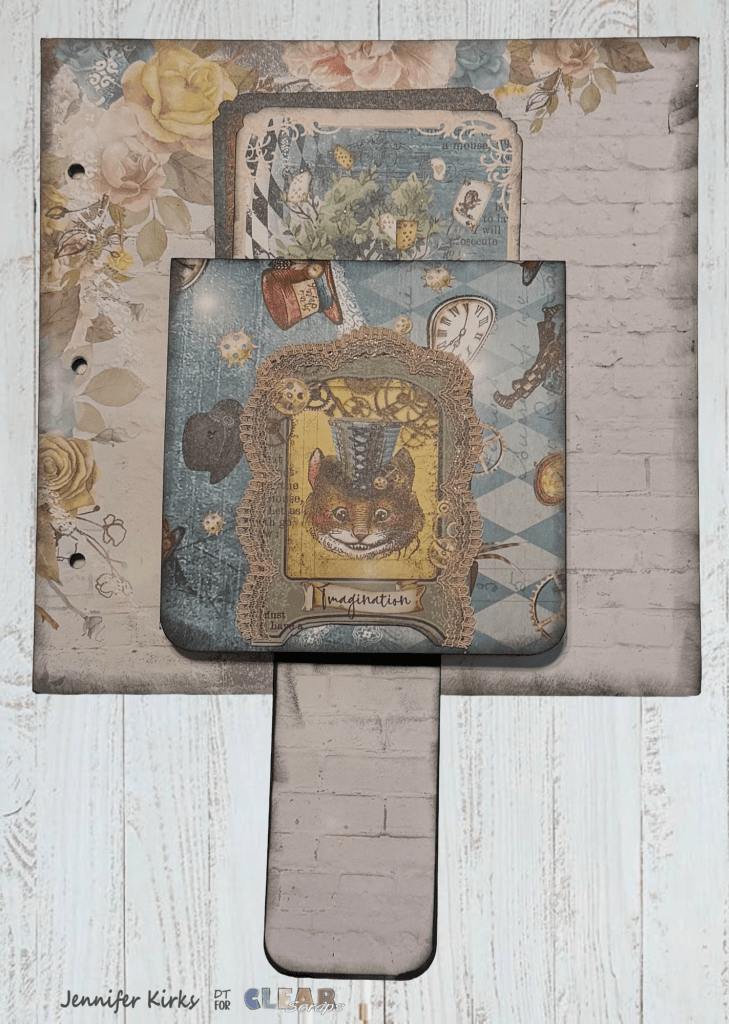
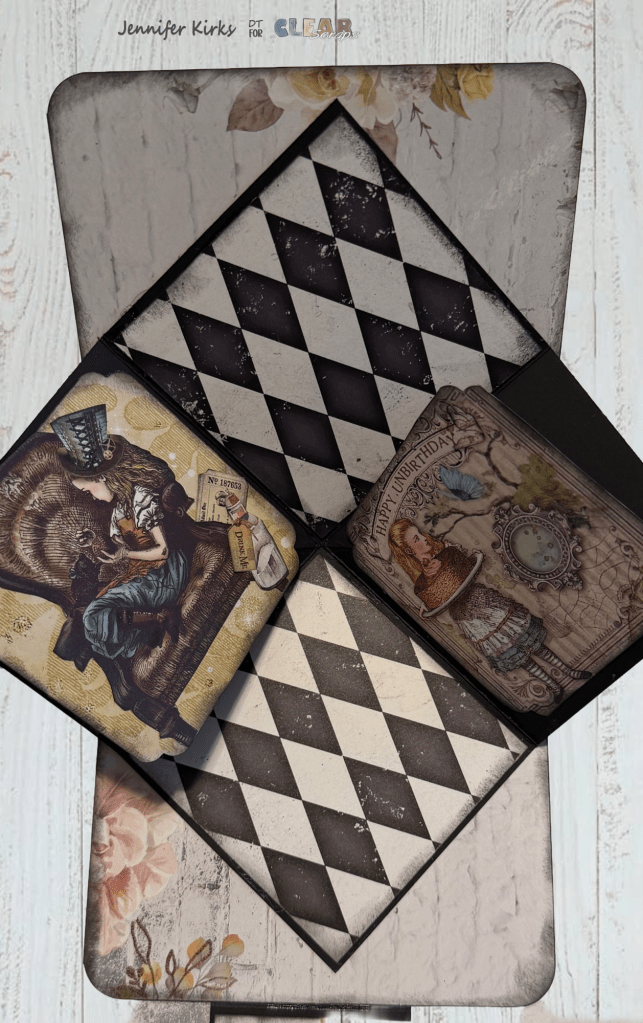
On the first page, I created a full fold-out layout. It includes a couple of pockets for tags and a spot for smaller photos on the upper flap. When you open it, there’s another hidden pocket tucked beneath the Queen of Hearts, perfect for extra journaling cards or photo mats.
For the next page, I added a playful pop-up pocket. When you pull down the small flap and flip the page up, a fun little pop-up appears with spaces for a few tiny photos. You can journal along the sides of the pop-up or decorate it with additional embellishments.
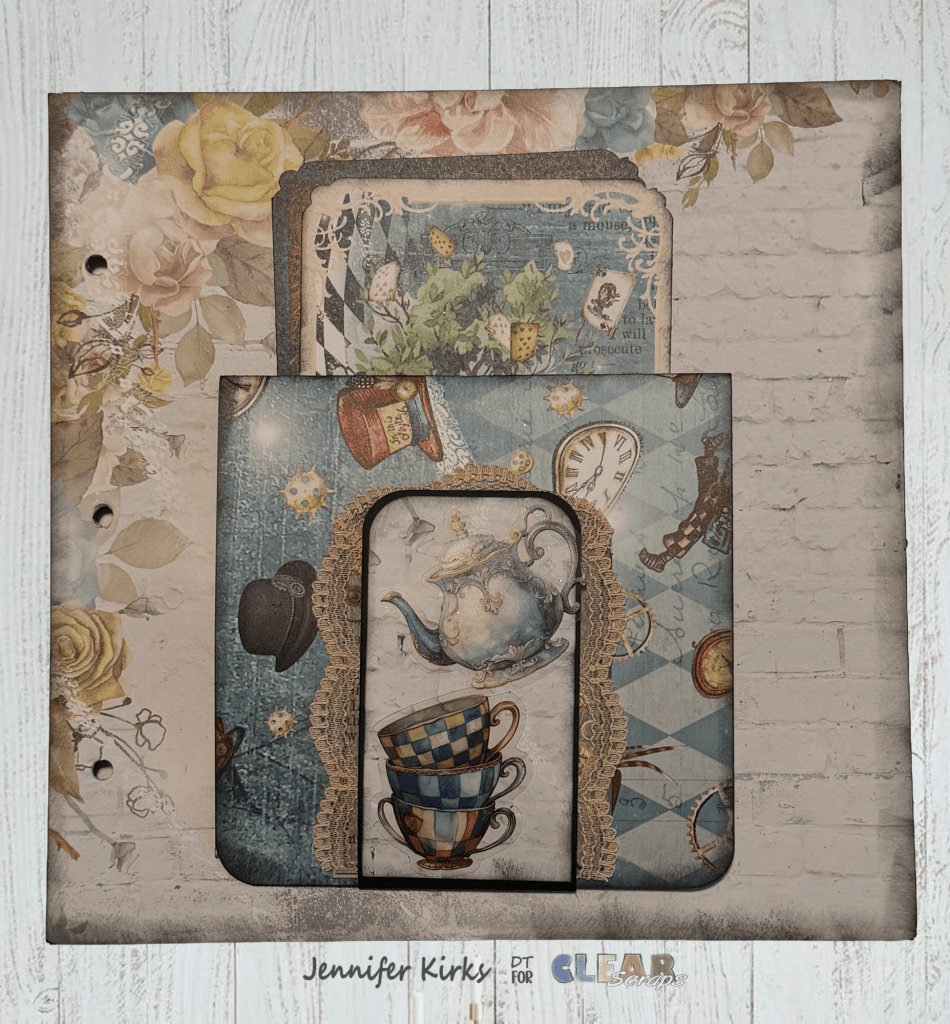
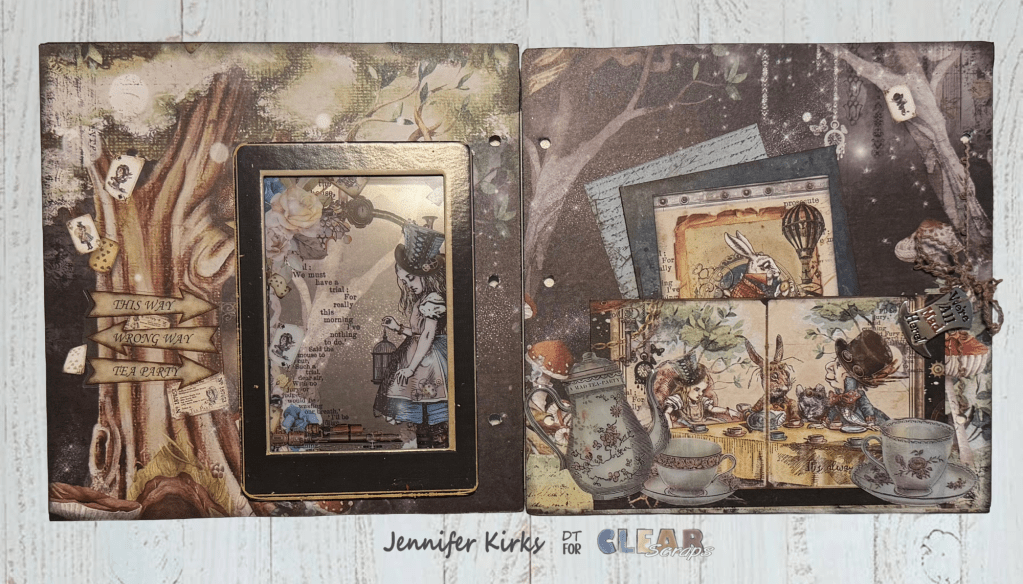
The following two pages feature beautiful forest-themed paper that immediately reminded me of the Mad Hatter’s tea party. I used a tag with the tea party scene and turned it into a pocket element. On the left side, I added a piece of Alice vellum framed to give it a soft, dreamy look. I’ll admit, I accidentally placed the right page on the wrong side before punching the holes! Instead of starting over, I embraced the moment. I punched new holes on the correct side and turned the original holes into a design opportunity by adding ribbon and a tiny hat charm. Remember—there are no mistakes in crafting, just opportunities to try something new.
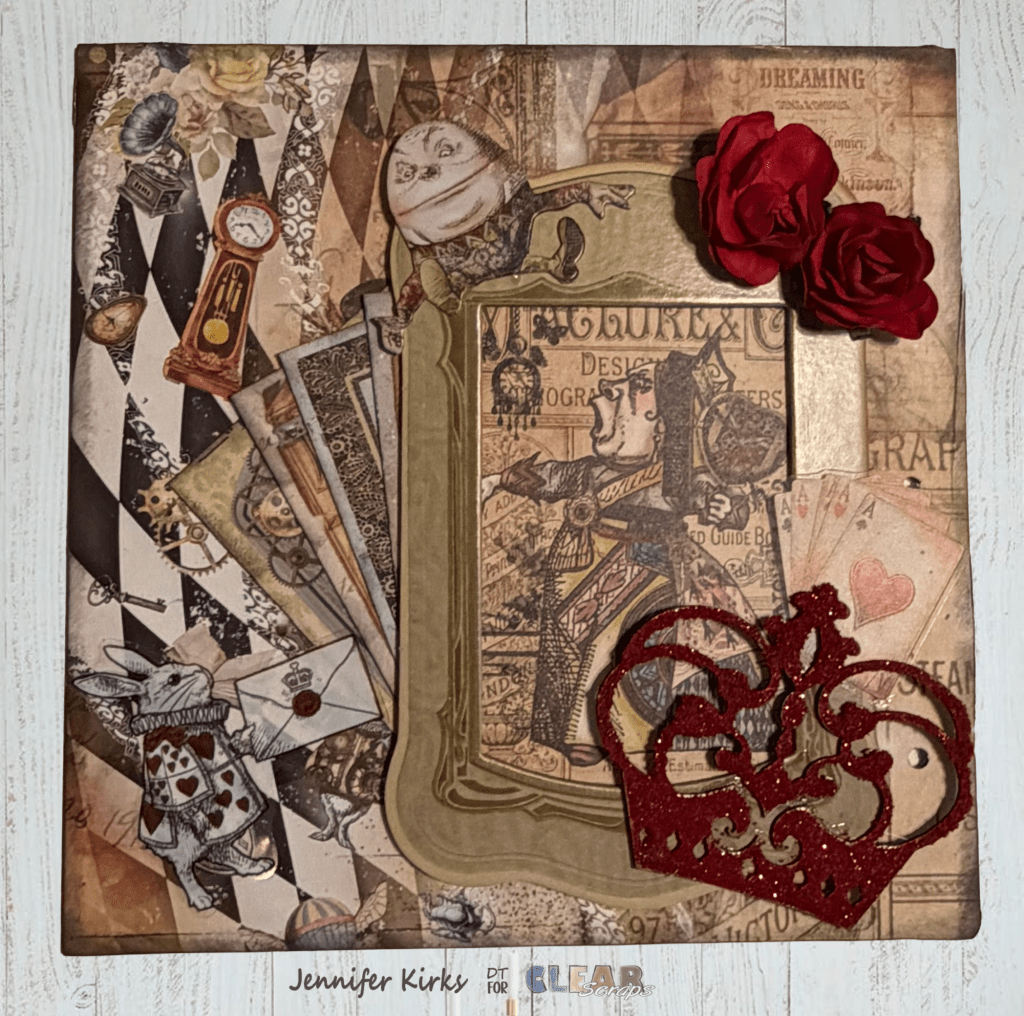
On the final page, I framed the Queen of Hearts and tucked a few tags behind the frame for hidden journaling. I also used one of the crown chipboard pieces and added a mixture of red sand and red glitter to give her crown a little royal sparkle.
This album was such a joy to create. I love stepping outside my comfort zone and experimenting with new techniques, and this project was the perfect place to do it. Mini albums like this are some of my favorites because you can keep them simple or add interactive elements that expand the storytelling—even with just a few pages.
Thanks so much for stopping by and taking a peek at this magical little album. Until next time—happy crafting! ✂️📖
Products used


Leave a comment