Hello friends and happy Friday! Halloween is just a few days away and I have a mini album I created to share with you today! Halloween is one of my most favorite holidays as I love seeing the kids dress up and trick or treat! I have teenagers now who have gave up costumes a long time ago (which makes me a little sad) but its fun to see the jack-o-lanterns out on the porches and all of the decorations!

For my project, I used the 6×6 3 Tabbed Chipboard Album and the Candy Corn Mini Shaker Shape.
I painted the outside edges of both sides of each page of my album with orange chalk paint (I prefer chalk paint because it dries quickly and I love this color!).

I also used the same chalk paint on the top frame of my shaker as well as the inside + outside edges of the two middle frames.

Ususally I would adhere my patterned paper to the base chipboard of the shaker. Since I wanted to use three different colors, I used my Beacon 3-in-1 Adhesive and lined up each space on the coordinating paper as shown. I trimmed any excess paper using my scissors.

I placed orange, yellow, and white sequins in the appropriate spots and then adhered my acrylic piece. I find it helpful to use clips to hold my pieces together while the adhesive dries.

After adhering the top frame, I again used my Beacon Adhesive to affix my shaker to the front of my album. I then added smaller embellishments from the collection I used.

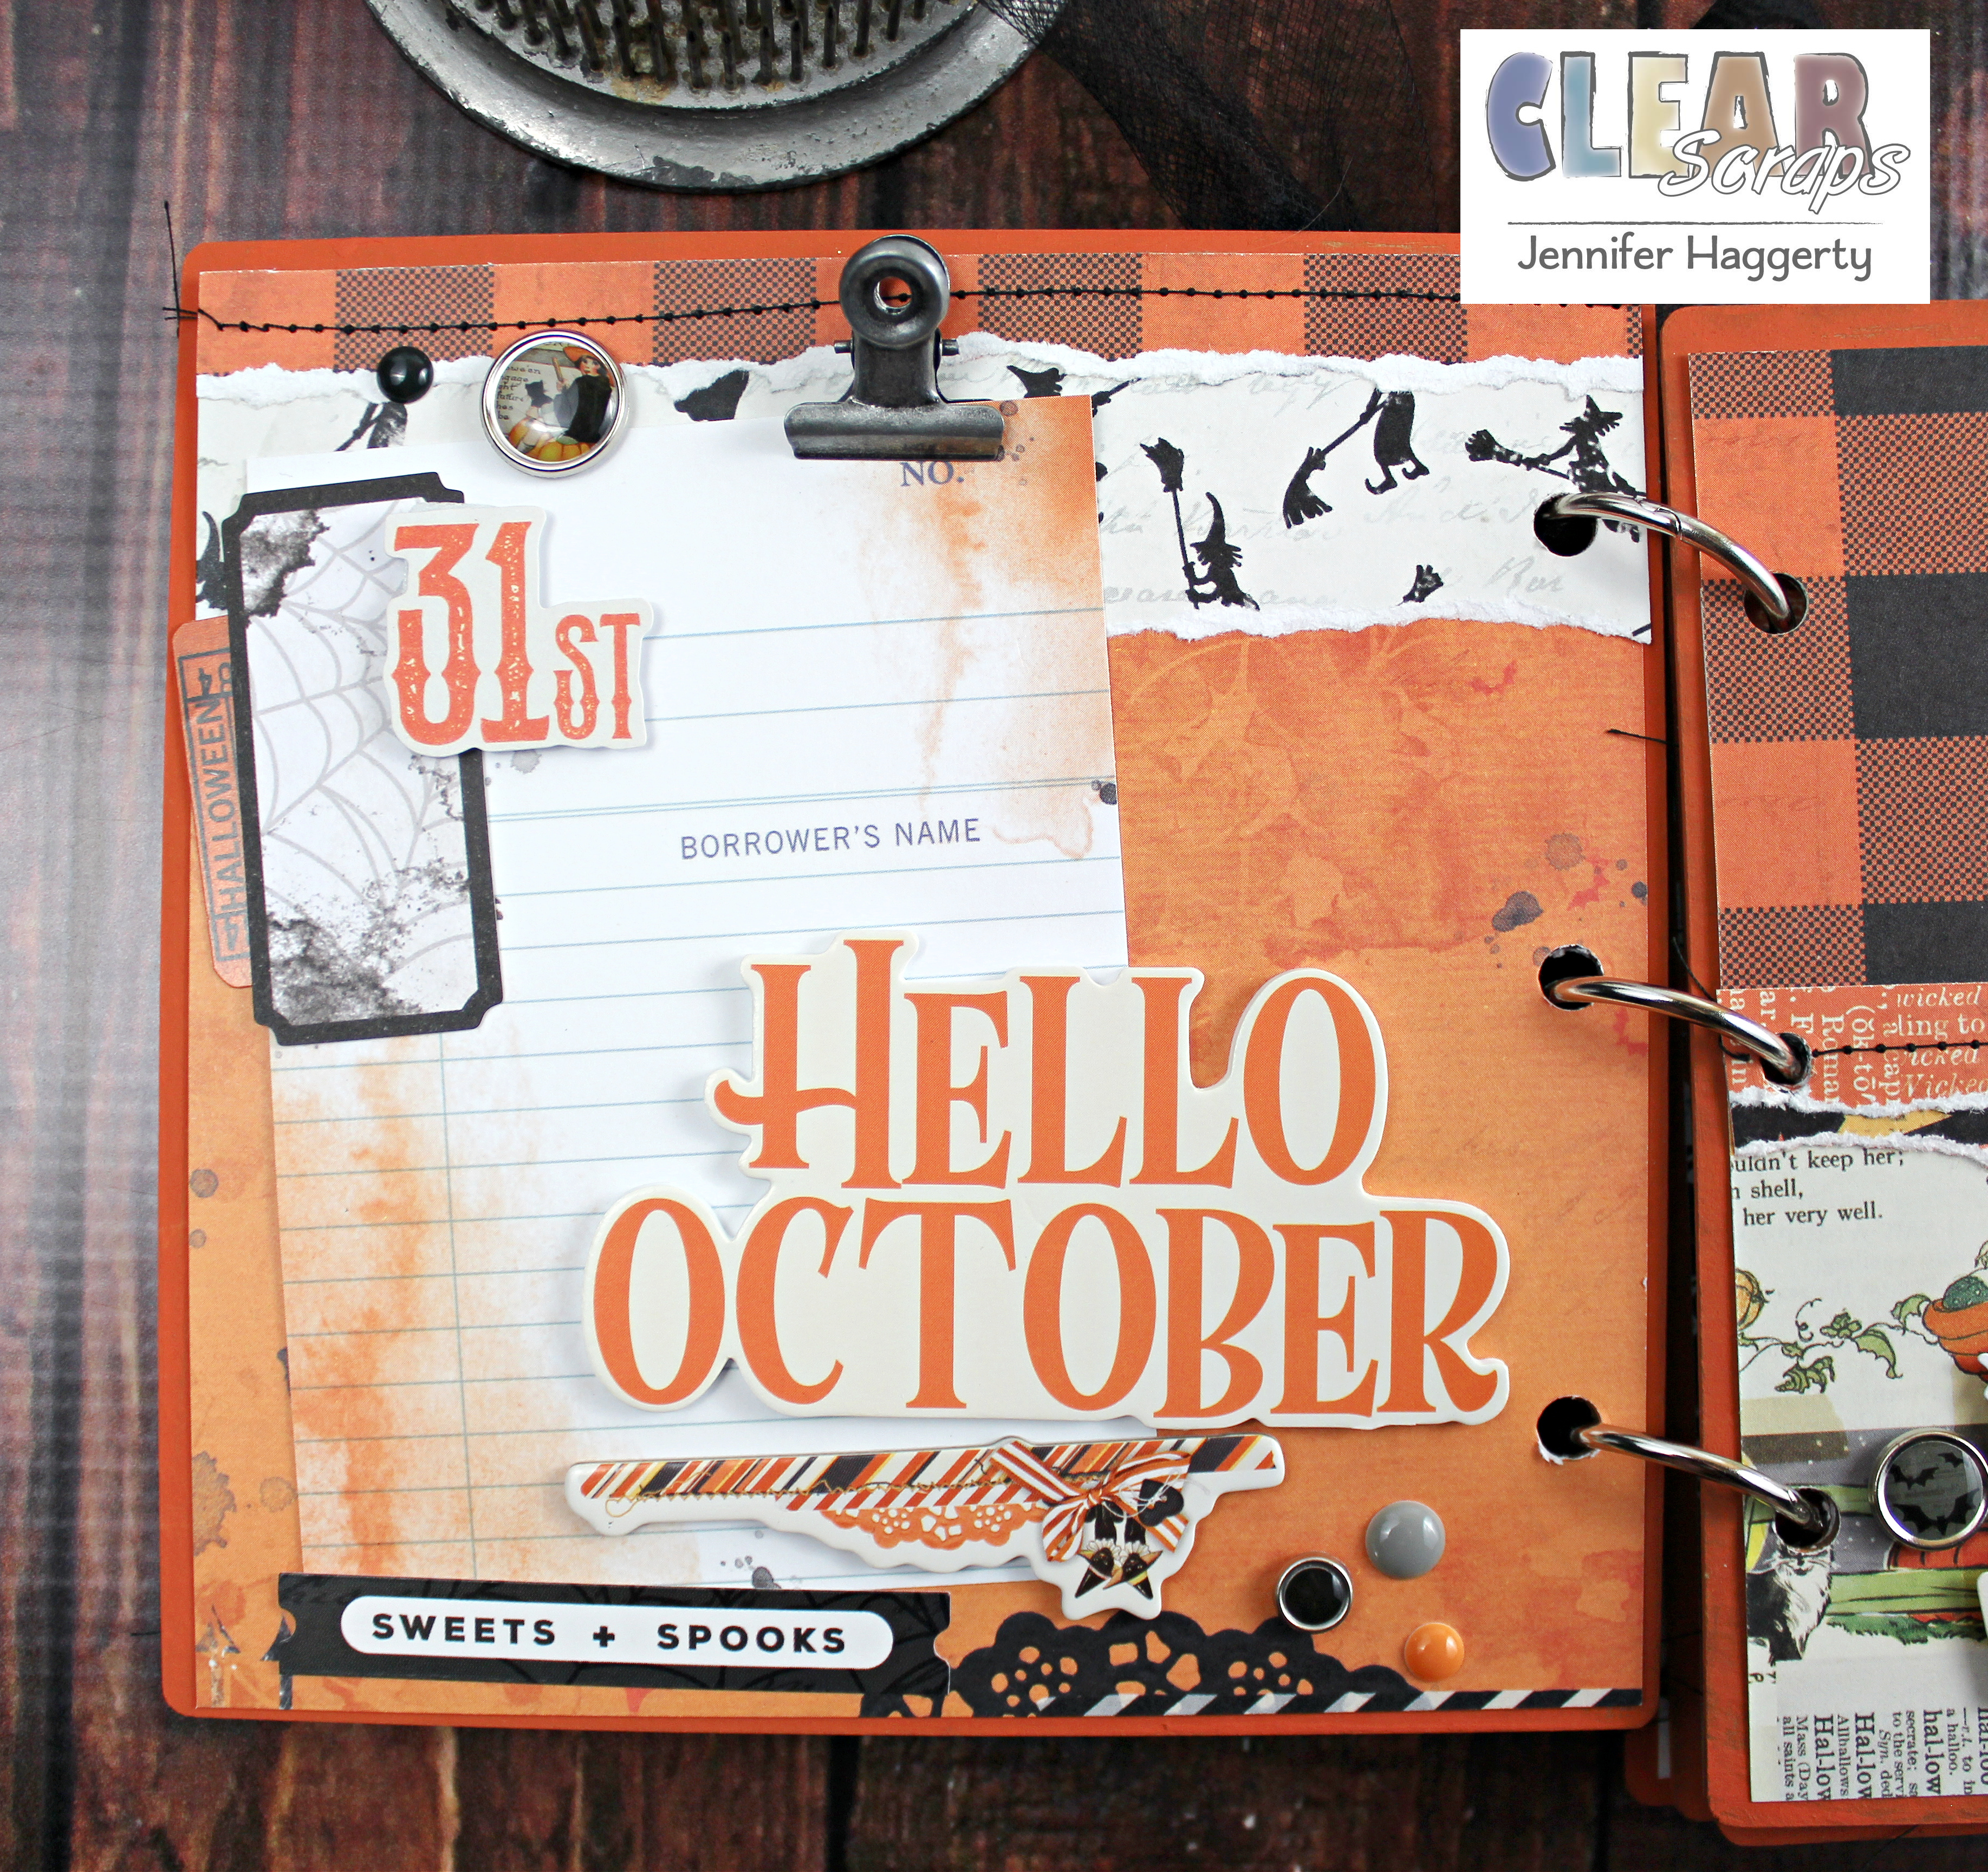
Each page is covered with a background piece measuring 5.5 x 5.5 inches that I affixed using Scor Tape. I usually leave the inside of my front cover for journaling as you see here.


I also like to create fun pockets for memorabilia or additional photos or journaling. Here, I utilized some of the journaling cards from the collection and added metal clips.


Another way to create additional space is to add a flap using a bone folder. I cut a longer piece of patterned paper and scored at 5.75 inches. I cut and tore my flap edge as well as added a tag for ease of opening.

You can see there is extra space for journaling as well as a photo.


Thank you for stopping by the blog today! You can find all of the Mini Shaker Shapes by clicking HERE! Have a wonderful day!
Additional products used: patterned paper, stickers, die cut shapes, brads, enamel dots, chipboard frames, foam stickers: Simple Stories; cardstock: Bazzill; paint: FolkArt; adhesive: Beacon, Tombow, Scor-Tape, Adhesives by 3L; metal clips, tiny attacher stapler: Tim Holtz; sequins: Recollections; bakers twine: Whisker Graphics; sewing machine: Janome; misc: chrome book rings, thread, tulle


Leave a comment