Hi Craft Friends!
My name is Dana and I'm back on the Clear Scraps blog with a Memory-Dex Divider Cards project. Have you seen the newest Clear Scraps Divider Cards available for purchase? For my project today, I'll be using the new Rounded Tag Acrylic Divider card Click here in addition I'll also be using the Rounded Acrylic Divider card Click here, Regular Tab Acrylic Click here and Clear Scraps Cog Gears chipboard embellishment Click here
I love creating these cards and they are so quick and easy to put together. The papers, embellishments, ephemera and more items in my stash are from Tim Holtz idea-ology.
To begin I chose several Tim Holtz Alcohol Inks in Brown, Orange and yellow and applied to each Acrylic card, front and back. Be sure to peel off the protective film from both sides before applying your Alcohol inks! I think the drips and spattered areas make the perfect background and match the Grungy look I'm wanting to create. Let dry. Here's how my cards look after applying the Alcohol inks.


Set aside your cards for now. Next cut apart one of the Clear Scraps Cog Gears from the chipboard frame. Save your other Cog Gears for a future project. Taking some Finnibair Rust pastes in Brown, Red and yellow and a stiff brush, I applied all three different colors in layers, until I achieved the desired result. Let dry. See photo:

Now we can decorate our Memory-Dex Divider Cards. I like to gather my scrap papers and match embellishments to my theme. I'll be using a clear tape runner, Diamond glue and Beacon glue to attach my embellishments to my cards.
Card 1 Front: I fussycut a section off of my Tim Holtz idea-ology pocket card and glued to the front center. I stapled my photo and glued in place. I torn a leftover scrap of paper into 2 pieces, inked around the edges using Tim Holtz Distress Ink Gathered Twigs and then glued in place on each side. Then added this Organic layers leaf on the left side. Here's a photo:

Card 1: backside: using foam dots I adhered these Tim Holtz Idea-ology vintage paper dolls in the center of my card. Here's a closeup look:

Card 2 front: I adhered a small pocket ccard to the frontside. Glued some mini paper dolls and a mini flair button on the bottom. I tied some jute cord through the hole at the top of my card. Here's a photo:

Card 2 Back: I cut apart a couple Collage strips and glued to the front. I added a Wonder button embellishment to finish. Here's how it looks:

Card 3 Front: Taking my Clear Scraps Cog Gears piece I glued a Finnibair Mechanicals Steampunk gear in the center. I added some Tim Holtz washi tape along the bottom edge of my card. Using Beacon glue I adhered onto the left side. I stapled a Collage strip photo and glued to the right side. I added a sticker sentiment below. Here's a photo closeup:

Card 3 Back: I added some washi tape along the bottom edge. I glued a Clock embellishment from my Tim Holtz idea-ology Junk drawer pieces on the right side. From my stash I glued a small screw in the center of my clock. I stapled another photo on the right and glued a numbers scrap of paper along the bottom. Here's a photo:

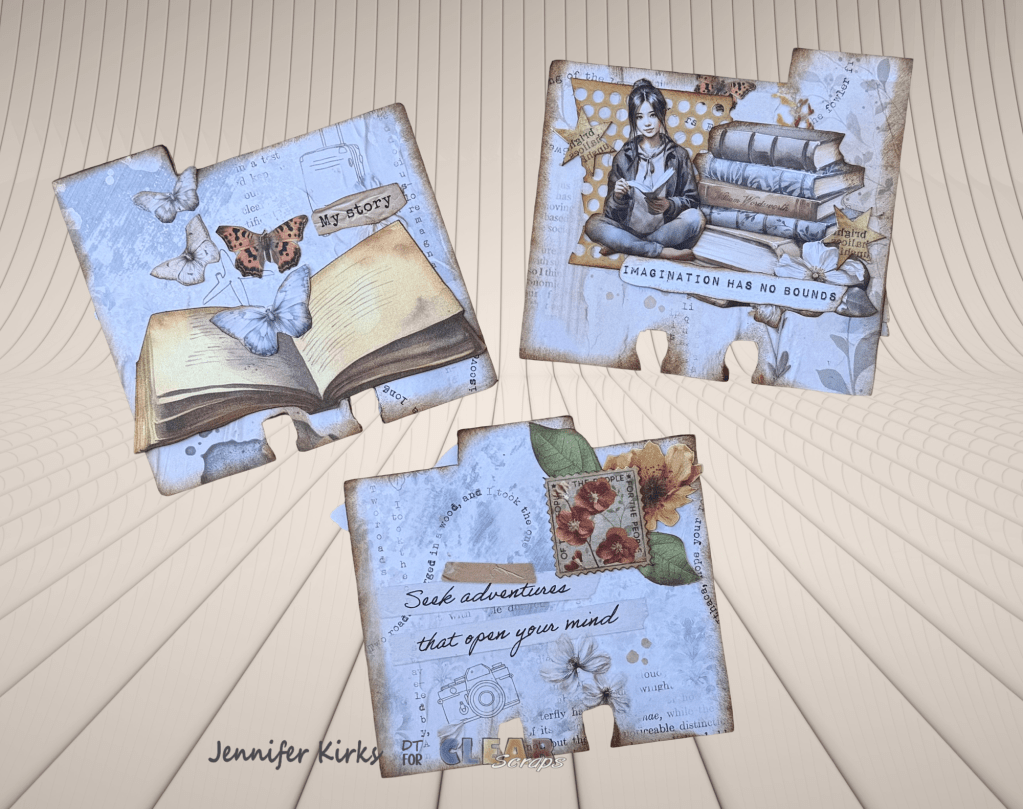
Here's another look at my finished cards:


Now our project is finished! Wasn't that easy? Be sure to visit the Clear Scraps website Click here for all your crafty needs. Here's a link to all the newest products available including our Wood Boxes that are great for organizing and storing all your Memory-Dex Divider Cards! Click here
I'll be back soon to share another project to hopefully inspire you! I want to wish you all a Happy and safe Thanksgiving Holiday!
Happy Crafting!
Dana
Other Supplies Used: Beacon glue, Tim Holtz Distress Ink Gathered Twigs, Alcohol inks Brown, Orange and yellow, Tim Holtz Idea-ology Junk Drawer Clock, Vintage Mini Flair Buttons, Collage Strips and Squares, Diamond glue, tape runner, stapler, Jute cord, Tim Holtz Idea-ology paper dolls, Finnibair Mechanicals Steampunk gear, Finnibair Rust pastes in Brown, Gold and Brown


Leave a comment