Hello, my name is Bethany and I am super excited to be guest designing for clear-scraps.com for the next 4 months! This is my first DT project and I hope you enjoy it! 
I received the House Memory-Dex box and couldn't wait to get started on it. I decided I wanted to paint the whole thing white, so I used an acrylic white paint from Folk Art in "Titanium White." It needed 2 coats of paint to cover it well!

Once the paint had dried, I used a wood glue to piece it all together.
I found it very important to glue on the front panel to the 2 side fences (the longer fences), then glue on the bottom of the box. I then added glue to one of the memory dex “holders” (the piece with the 2 holes, where the rods fit in) to the back of the house shaped panel.

Next, I glued the rods into the holes of the "holder" and then added glue to the opposite ends of the rods and slid on the second "holder".

I did this step before adding the back end of the fence (the shortest fence). I then glued the "holder" onto the back fence.

Once assembled, I got to decorating! I am full into Christmas Crafting at the moment, so I knew I wanted this house to be set in a winter scene and the house to be decorated for Christmas!

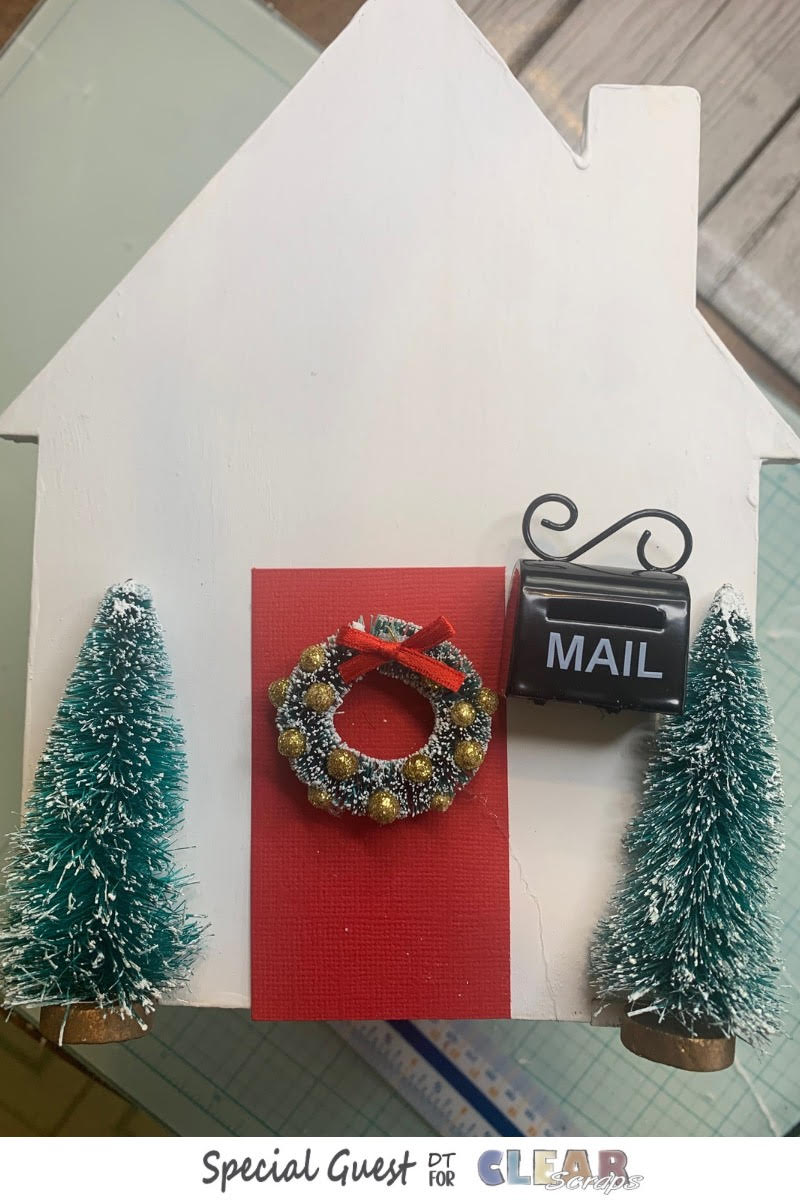
To add the door, I simply cut a piece of red cardstock to 2" wide x 3.5" tall and glued it to the front of the house, centering it as best as I could. The door was screaming to be adorned with a wreath so I used a mini bottle brush wreath that came with a tiny red bow on the top. I added these gold-glitter "balls" (vase filler) to look like gold ornaments all around the wreath by hot gluing them. (I will list all of the decorative items I used and where I got them, below!)

I took 2 snowy-looking bottle brush trees and actually cut half of the bristles off of the back of the trees so that they would be flat and I could hot glue them to the front of the house! This was done for looks but as a bonus, it hides where the fence pieces connect to the front of the house!

A friend had sent me some adorable mini Christmas lights in a recent happy mail package and I used them to string along the roof of the house and I hung them on the bottle brush trees. I used hot glue to attach all of the "lights"!

Because I am a happy-mailer and craft mostly for that reason, I knew I had to have a mailbox attached to the front of the house! I found this one at Hobby Lobby and it came with a stand… but I just used wire cutters to cut the thin metal stand in order to get the stand-alone mailbox that I also attached with hot glue! And of course, when I saw mini-mail packages, I knew I needed to glue one on top of the other and stack them right by the door. I attached them with hot glue, as well.


Finally, I knew it needed SNOW to complete the look! This artifical snow was attached with hot glue in one small area at a time-beware, this does get messy! However, I think it really pays off in the end as that "final touch"!

I hope you are inspired to re-create this Christmas decorated House Memory Dex box! I love how it came out and hope you do to! 
Supplies I used from Hobby Lobby:
-Folk Art Titanium White acrylic paint
(All from the "mini doll house" section!)
-Artificial snow
– bottle brush wreaths
-bottle brush trees
-Mini Mail box
-Mini Mail packages
From Hobby Lobby's Christmas section:
-Gold glitter ball vase filler
-Mini stringed Christmas lights


Leave a comment