Ahoy, friends! Jennifer here, popping onto the blog to share a fun and breezy beach-themed picture frame project. When my kiddos were younger, we took a family trip to Port Aransas, Texas, where they climbed aboard a pirate ship for a few hours of swashbuckling adventure. They had an absolute blast pretending to be pirates, and it was one of those magical family moments I just had to preserve.
This picture frame was inspired by that unforgettable day, but I designed it to be versatile enough to showcase memories from any beachy getaway. Whether it's sandy toes, salty breezes, or sun-kissed smiles—this frame is ready to hold it all!

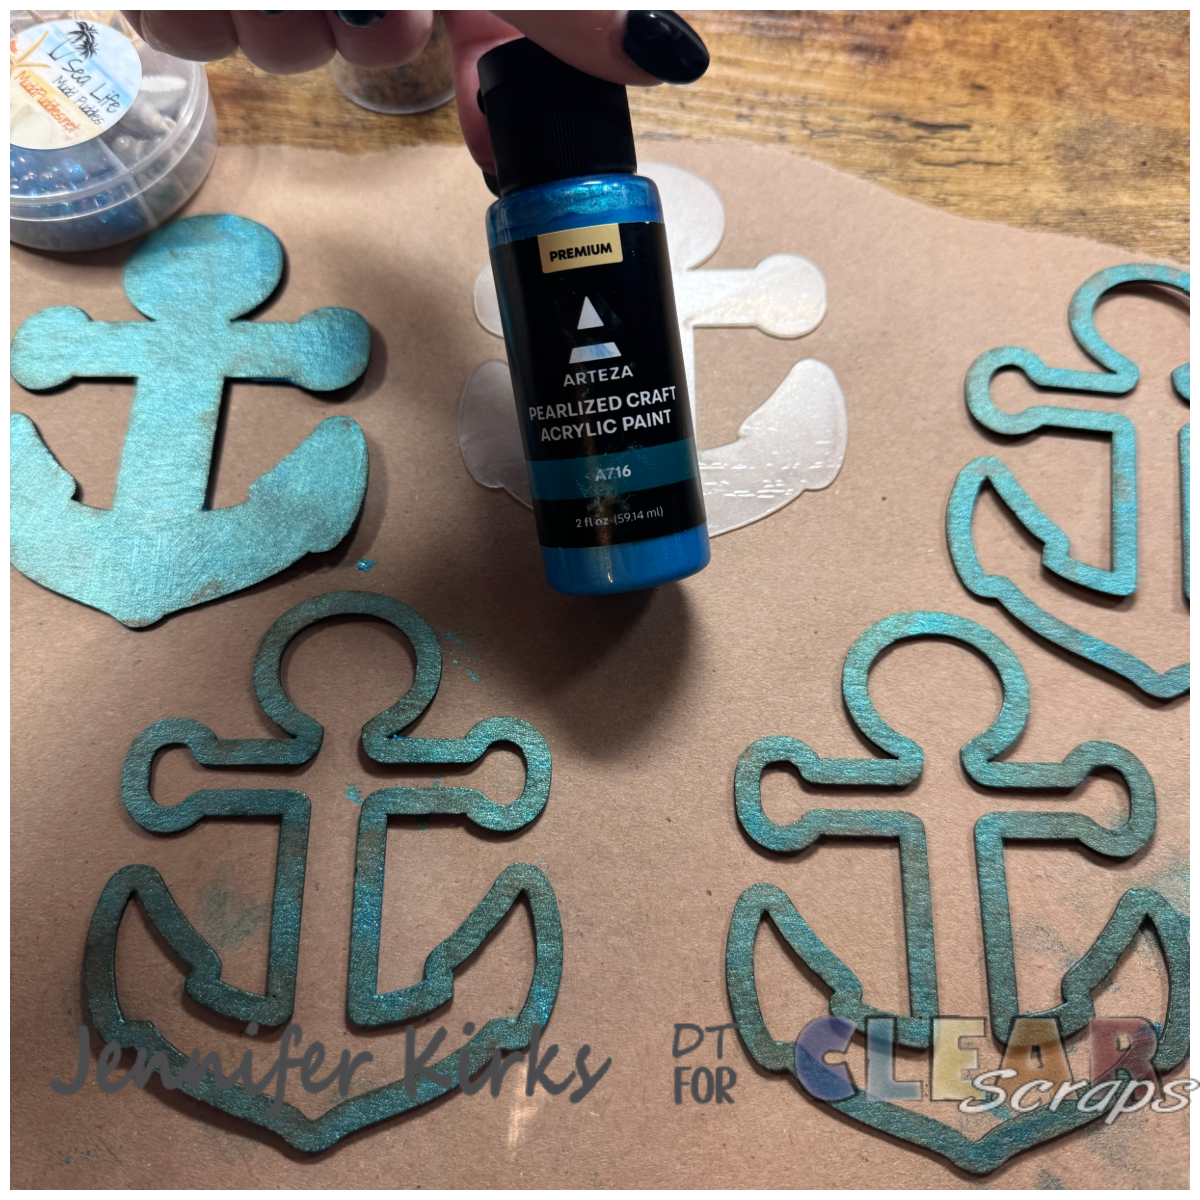
First, I reached for the anchor shaker and gave the chipboard pieces a coastal makeover with a gorgeous blue-green metallic paint—think shimmering ocean waves! Once the paint dried, I glued the first two chipboard layers to the bottom base and started the fun part: filling the shaker. I added a mix of sand, tiny seashells, and bits of sea glass to bring a little beach magic to the frame.
With the shaker filled, I carefully peeled the protective film off both sides of the acrylic piece and glued it in place to seal everything in. Then came the final chipboard layer, locking in all those coastal treasures. To finish it off, I took the same paint and gently brushed it around the outer edge of the shaker, tying everything together with a subtle shimmer.


Next, I grabbed the coral chipboard piece and gave it a vibrant, beachy texture by covering it with a reddish-orange sand—like a pop of sunset color from beneath the waves. While that dried, I turned my attention to the base pieces and the frame, giving them a soft coat of pearly paint for a subtle, sun-kissed shimmer.

Once everything was dry, I traced the smaller base piece onto a lovely blue and cream striped paper that reminded me of a breezy beach cabana. After gluing the paper down, I cleaned up the edges with an X-Acto knife for a crisp, clean finish, then lightly inked the edges to add some depth and definition.


Using the X-Acto knife again, I carefully cut two slits into the piece and glued it onto the larger base layer—bringing all the elements together for a layered, coastal look that’s full of texture and charm. To tie all the colors together, I picked a beautifully printed paper in shades of orange and blue—perfect for capturing that vibrant, beachy vibe. I traced the picture frame onto the paper, cut it out, glued it down, and cleaned up the edges with my trusty X-Acto knife for a neat finish. A little inking around the edges added that extra bit of dimension and softness.
Next, I grabbed some pop dots and placed them near the edges of the frame—be sure to leave enough space so your photo can slide in easily! Then, I carefully attached the top frame piece to the bottom base, creating the perfect spot to showcase a favorite seaside snapshot.


Then it was time for the finishing touch—I grabbed the “Vacation” chipboard piece and gave it a bold coastal pop by covering it with deep blue sand, evoking the rich color of the ocean depths. While that was drying, I gathered a mix of sand, tiny seashells, and sea glass and artfully scattered them around the base of the picture frame for that authentic, beachcombed feel.
Once everything was ready, I carefully arranged all the elements on the frame base, playing with the layout until it perfectly captured the carefree spirit of a sun-soaked vacation. The result? A beautiful, beachy keepsake ready to frame a treasured memory from the perfect seaside escape.


Thank you so much for stopping by and spending a little time with me today. I hope this beachy picture frame project inspires you to capture your own sun-soaked memories in a creative way. Wishing you a fun, relaxing, and safe summer—may it be filled with sandy toes, salty air, and plenty of laughter! ~Jennifer
Products used
Graphic 45 Sunkissed
Mudd Puddles sand and glass
Stazon Brown ink
Tiny sea shells


Leave a comment