Every December, my aunt hosts a family Christmas party, bringing everyone together for a day of catching up, celebrating, and making memories. Since most of my family still lives in my home state, these gatherings are something I look forward to whenever I have the opportunity to attend. I wanted to create a special place to preserve photos from these annual celebrations, so I decided to turn the Clear Scraps Acrylic Recipe Stand 4×6 Kit into a Christmas memory album!
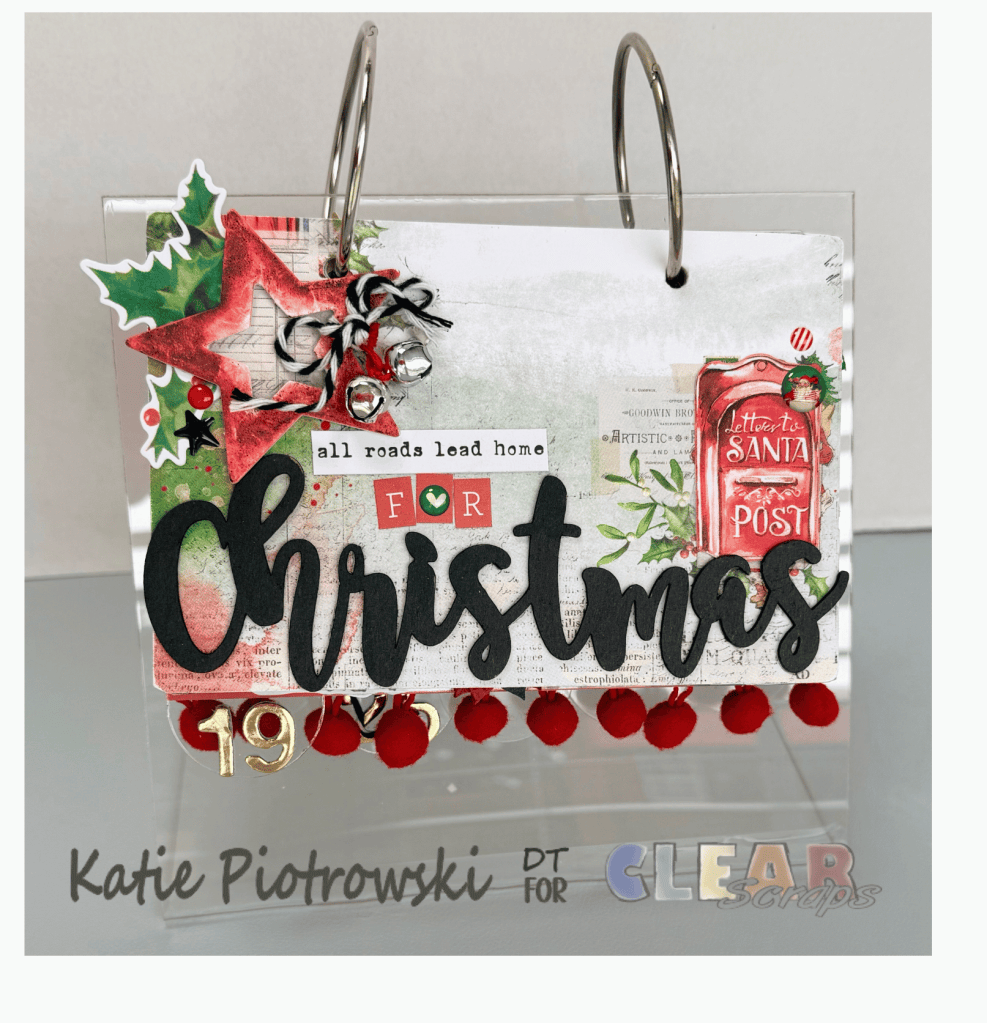
My plan is to use each tabbed section to document a different year of our family Christmas gatherings. This will be an ongoing project that I can add to as the years go by, making it a fun way to look back on all the memories we’ve made together.
To get started, I used a 6×8 double-sided paper pad and cut the sheets in half horizontally, giving me two 4×8 pieces from each sheet. I used these pieces to cover both sides of the chipboard pages, allowing the A-side design to show on one side and the B-side design to show on the opposite side. This gave each page a coordinated look while allowing me to incorporate multiple patterns throughout the album.
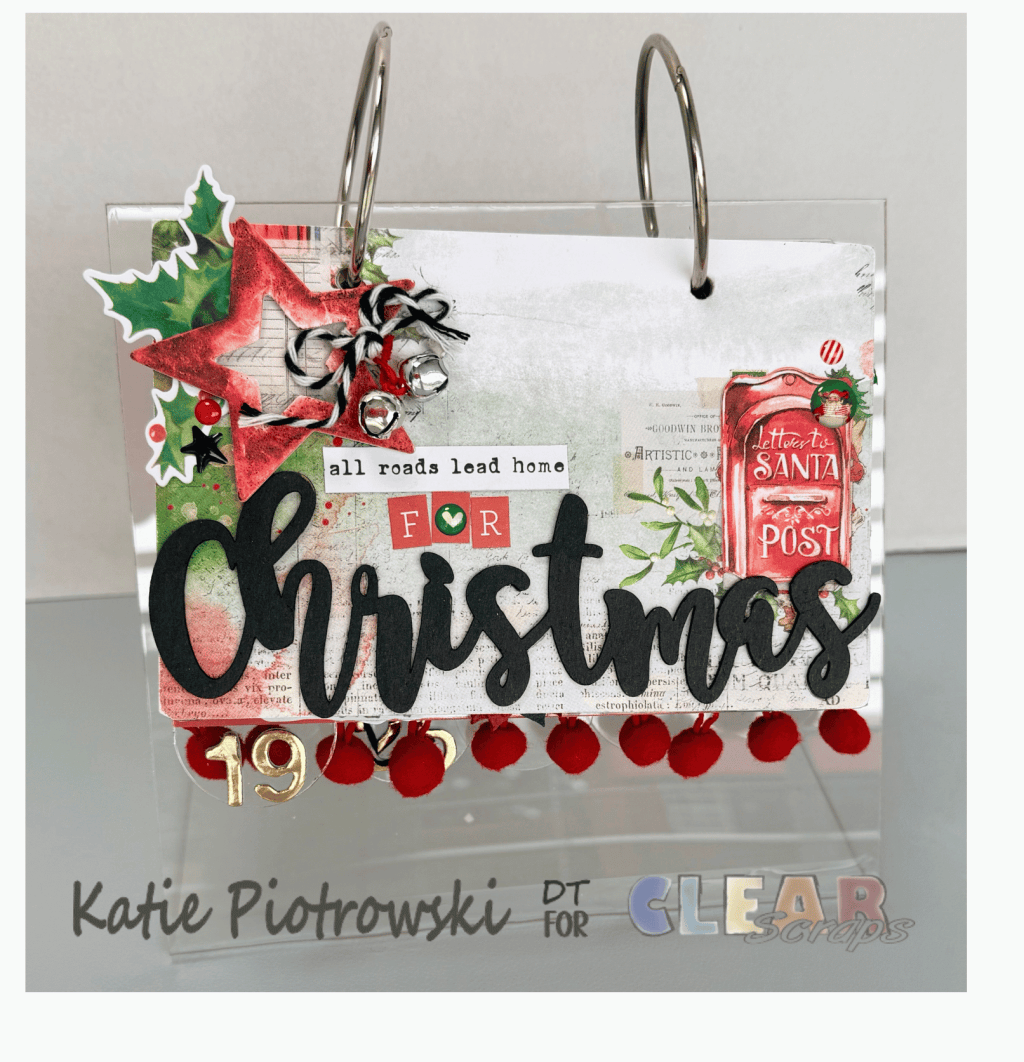
For the cover, I added the Clear Scraps Script Christmas and Holly Berries Chipboard Word, coloring the chipboard with a black acrylic paint marker. I then created an embellishment cluster in the upper left corner and tied a few small jingle bells to the star using baker’s twine. On the right side, I added mailbox ephemera and enamel dots, then finished my sentiment using a trimmed ephemera word, alphabet stickers, and another enamel dot.
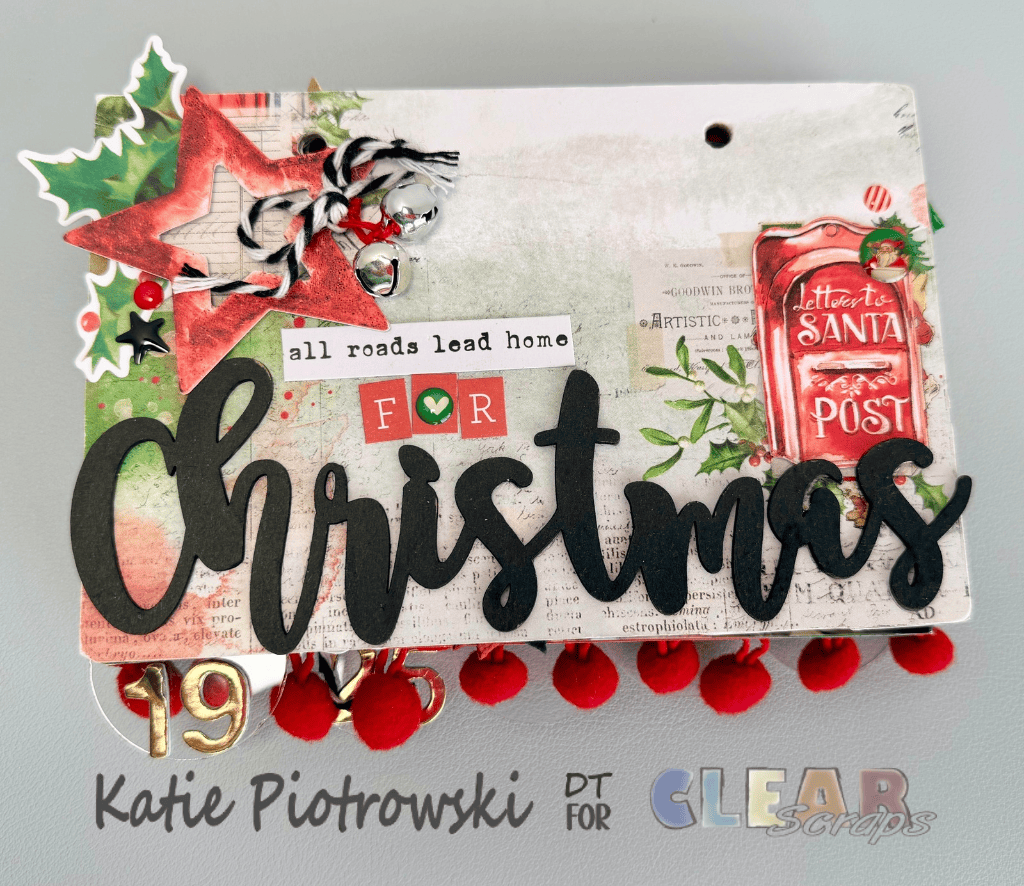
The completed title reads, “All Roads Lead Home for Christmas.” It felt especially fitting for this project since the party takes place in my home state, where the majority of my family still lives.
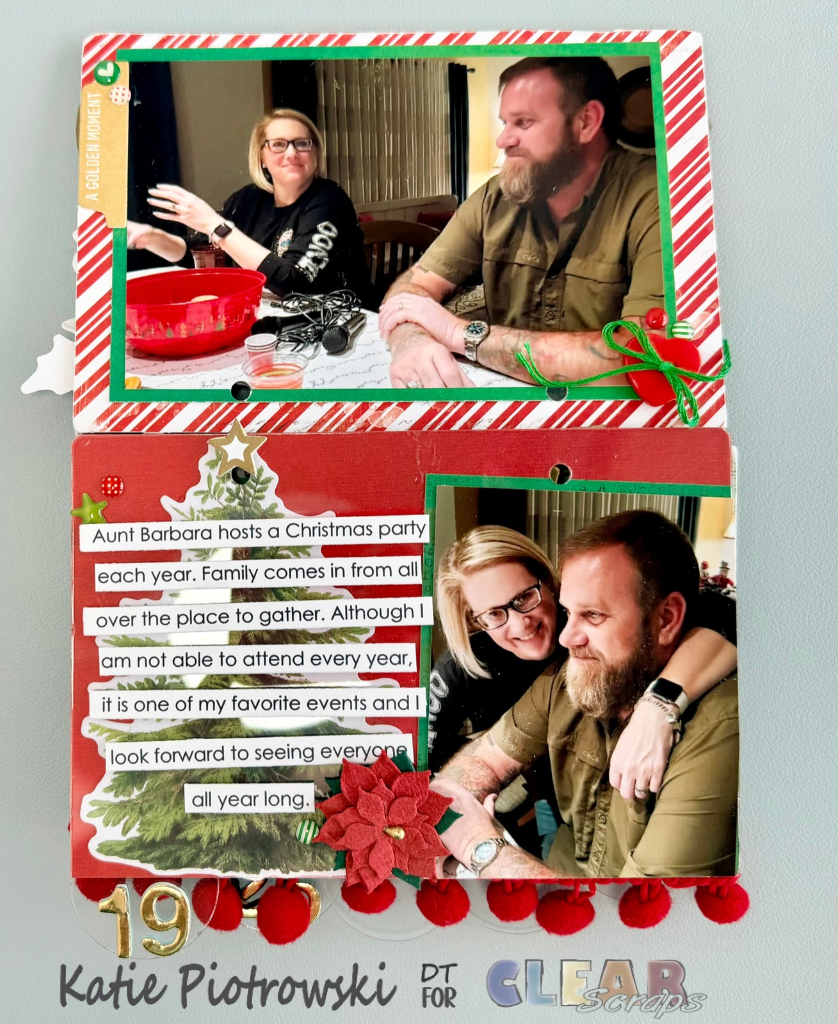
For the first chipboard page, I simply printed and matted my photo, trimmed to approximately 3×5 inches, and adhered it to the page. A heart button and a few enamel dots completed the design.
Next came the first acrylic tabbed page. I used Thickers to add the year to the tab and printed my photo in a 2×3 format. After matting it, I adhered it at an angle along the right side of the page, allowing it to extend slightly beyond the bottom and right edges.
Because this is an acrylic page, I wanted to make sure the adhesive wouldn’t be visible from the opposite side. I trimmed a piece of red cardstock to approximately 4×6 inches and added it to the back, initially placing adhesive only behind the photo.
I then tucked a large ephemera tree underneath the acrylic page so it would show through the open areas. For my journaling, I printed the text in strips, die cut them, and attached them to the top of the acrylic page using foam adhesive. I love the dimension this created, especially with the tree peeking through underneath! A poinsettia and a few enamel dots finished off the page.
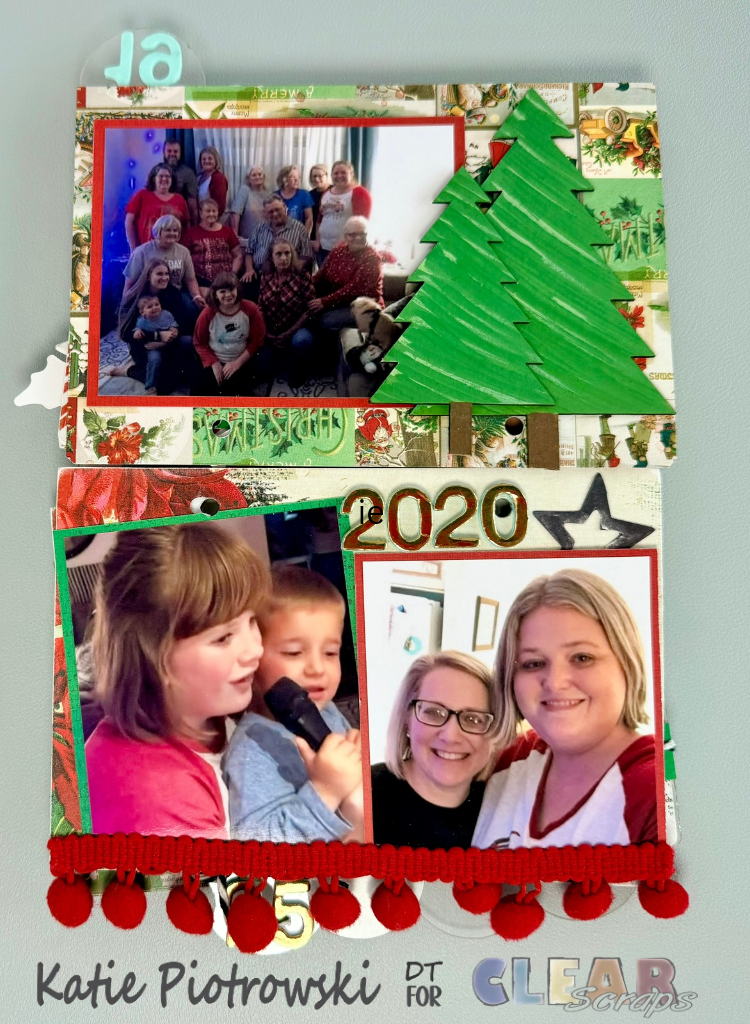
Moving to the next chipboard page, which was already covered on the reverse side of the red cardstock, I added another printed, trimmed, and matted photo to the left side. I used the Clear Scraps Pine Tree Embellishments to create a little Christmas scene on the right. I colored the chipboard trees using multiple shades of green acrylic markers, adding small swoops and strokes to create additional detail. I then layered the smaller tree over the larger one for added dimension.
For the accompanying page, I added a section of red pom-pom trim along the bottom edge. I printed, trimmed, and matted my photos, then arranged them at slight angles, allowing them to overlap in the center. I finished the page by adding the year to the top using Thickers.
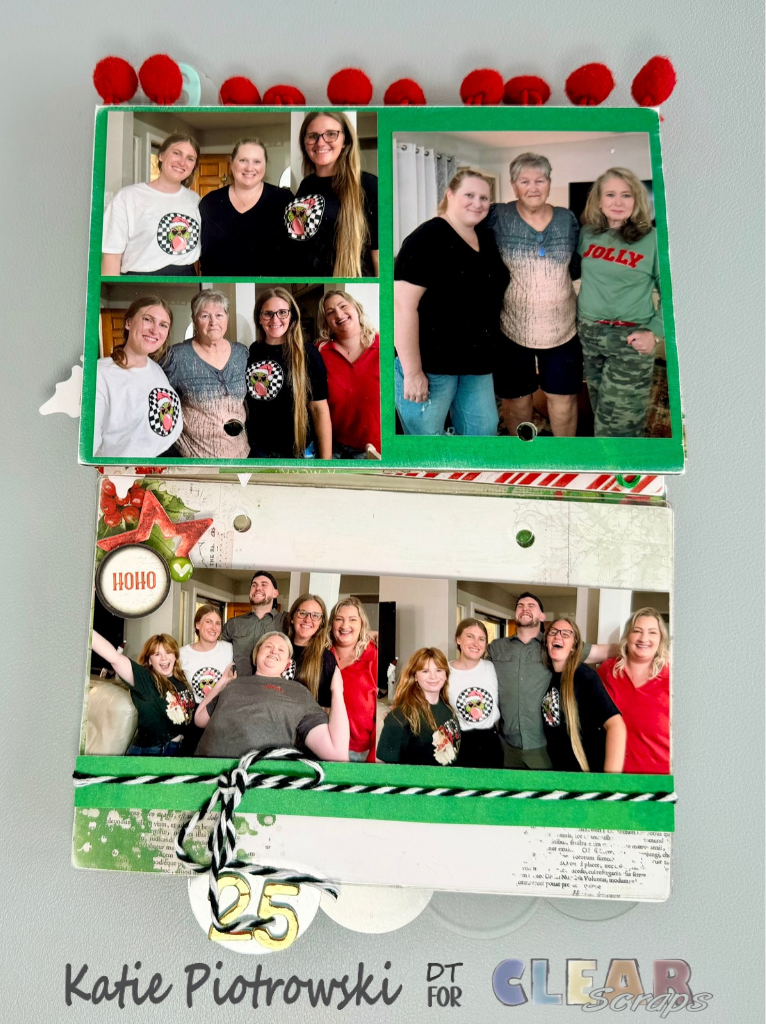
For the next set of pages, I continued building on the same design elements while giving each section its own personality. I printed and trimmed my photos and added a few to the top page.
For the bottom acrylic page, I cut a green cardstock strip measuring approximately 1/2 x 6 inches and layered a piece of baker’s twine tied in a bow over it. I attached the strip about 3/4 inch from the bottom using foam adhesive, then centered my remaining two photos above it.
To finish the page, I tucked a small star embellishment partially underneath the upper left corner of the photos, added an ephemera piece featuring “HO HO HO,” and finished with an enamel dot. Just like the previous acrylic page, I added the year to the tab using Thickers.
One of my favorite things about this project is that I have already prepared the backgrounds for all of the remaining chipboard pages. That means when another Christmas rolls around, I can simply add my photos, journaling, and embellishments to document another year of family memories!
I had so much fun transforming the Clear Scraps Acrylic Recipe Stand Kit into a little Christmas album. I love that it is both a creative way to display our family photos and a keepsake that will continue to grow over time.
Clear Scraps Products Used
Clear Scraps Acrylic Recipe Stand 4×6 Kit
Clear Scraps Script Christmas and Holly Berries Chipboard Word
Clear Scraps Pine Tree Embellishments
What family traditions do you look forward to every Christmas? Do you have an annual gathering, holiday party, or special tradition that you love documenting? I’d love to hear about it in the comments! And if you have a collection of holiday photos waiting to be scrapbooked, consider creating a mini album that you can add to year after year.
Happy Crafting!
Katie



Leave a Reply