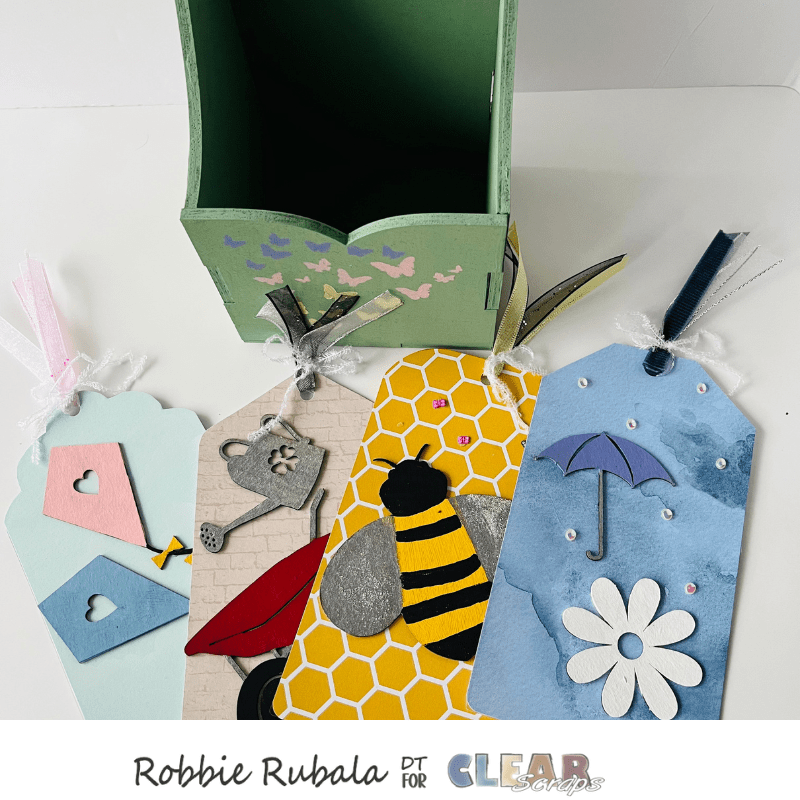
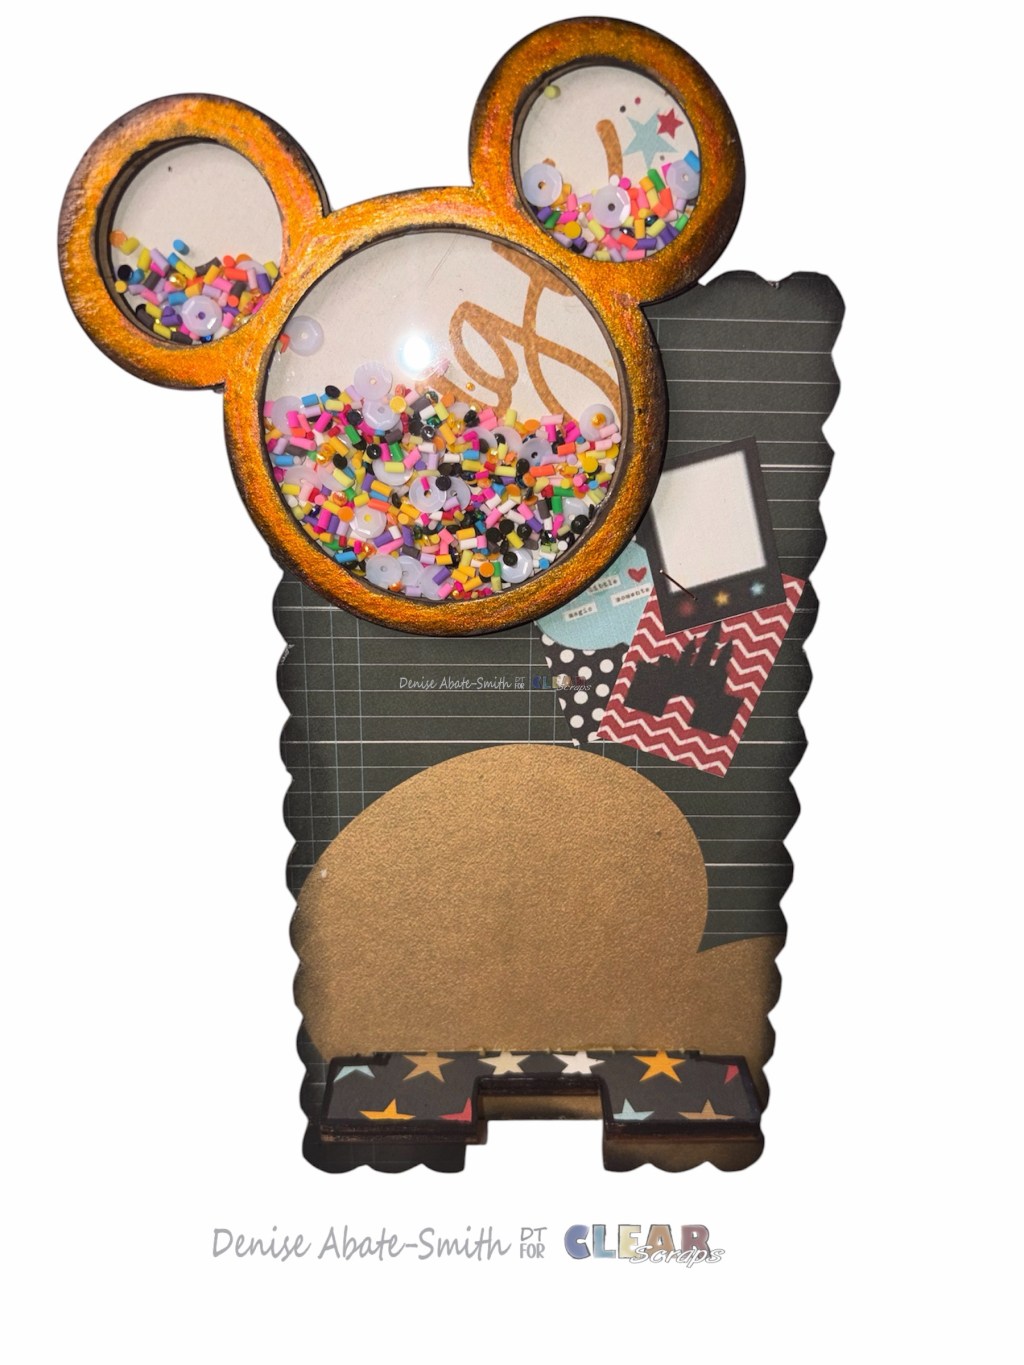
Tag Box with tags
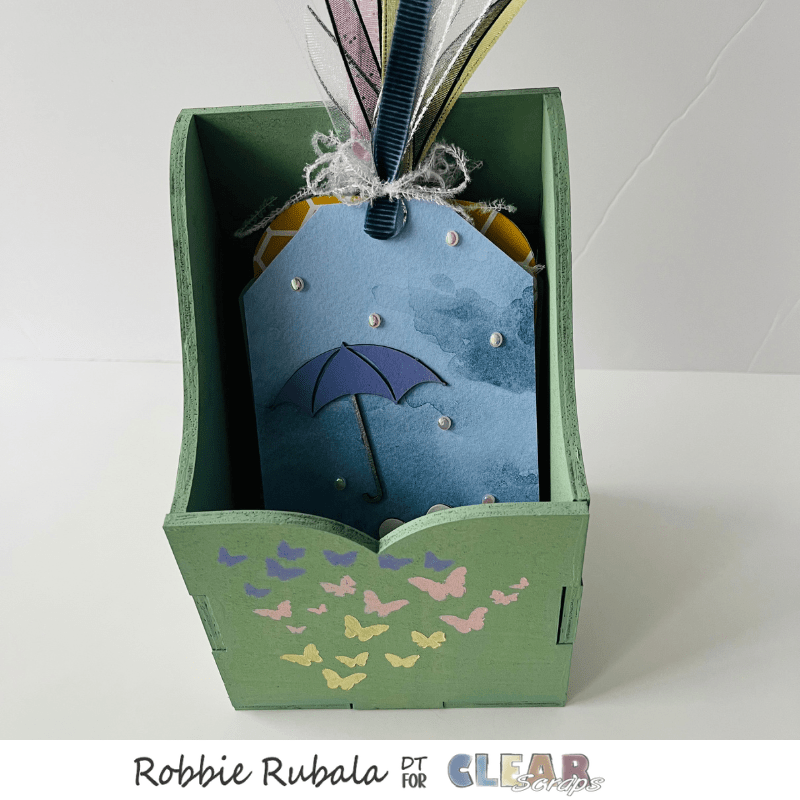
I combined lots of Clear Scraps products to make today’s idea. I thought it would be fun to do a spring box to show you how you can use the products to make home decor items for your house.
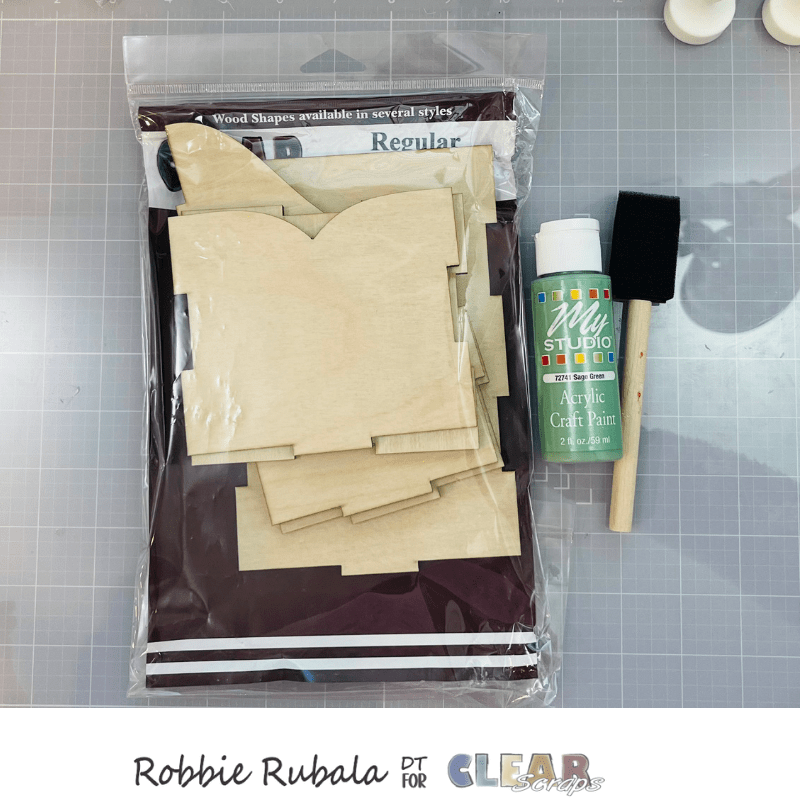
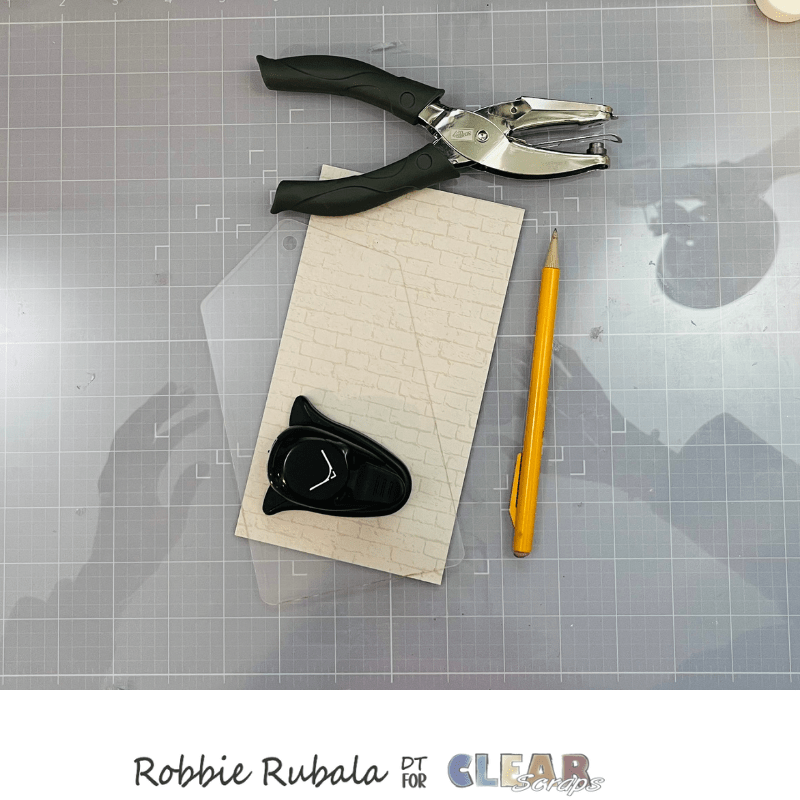
For today’s idea you will need the following products – Wood Regular Tag Box, acrylic tag album, kites chipboard embellishments, wheelbarrow chipboard embellishments, embellishments chipboard punch out Spring, mini shaker bee, butterfly flock stencil, sprinkles butterfly medley, cloud stencil, white ink, heat tool, pattern paper, acrylic paint, stencil brush, ribbon, pencil, corner rounder, hole punch, Gesso, strong adhesive, blending brush, foam brushes, paint brushes, and gems.
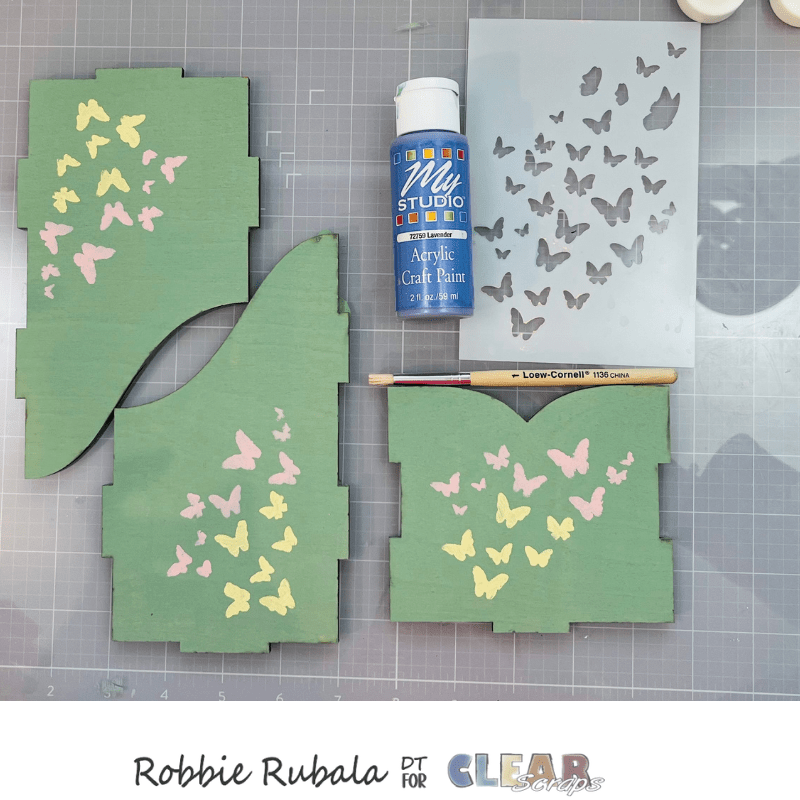
To begin taking your tag box and paint all sides of each piece green.
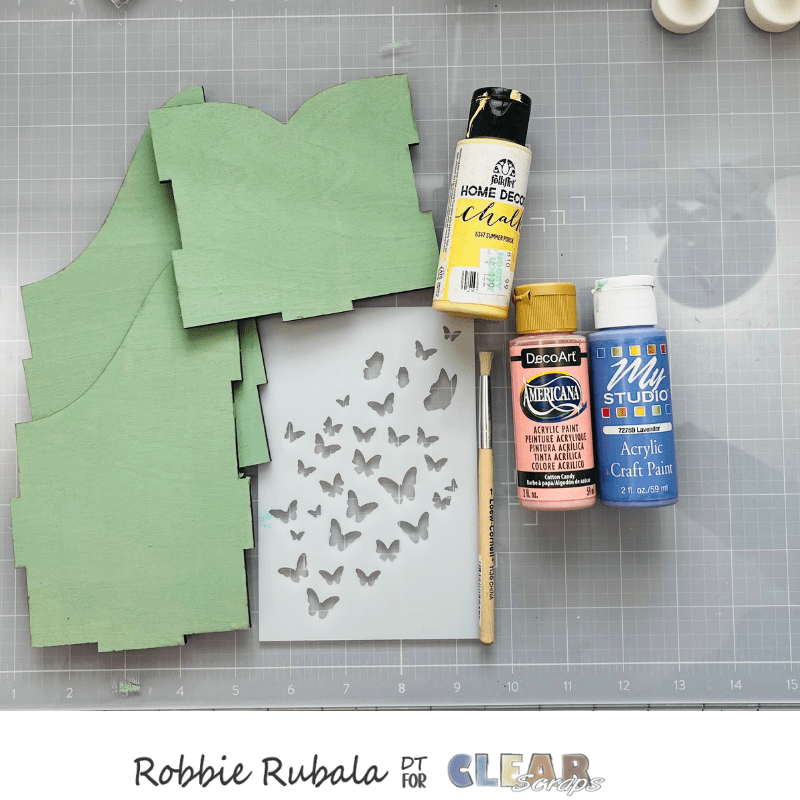
When it is dry choose some acrylic paint and using your stencil and stencil brush add butterflies to the outsides of the box.
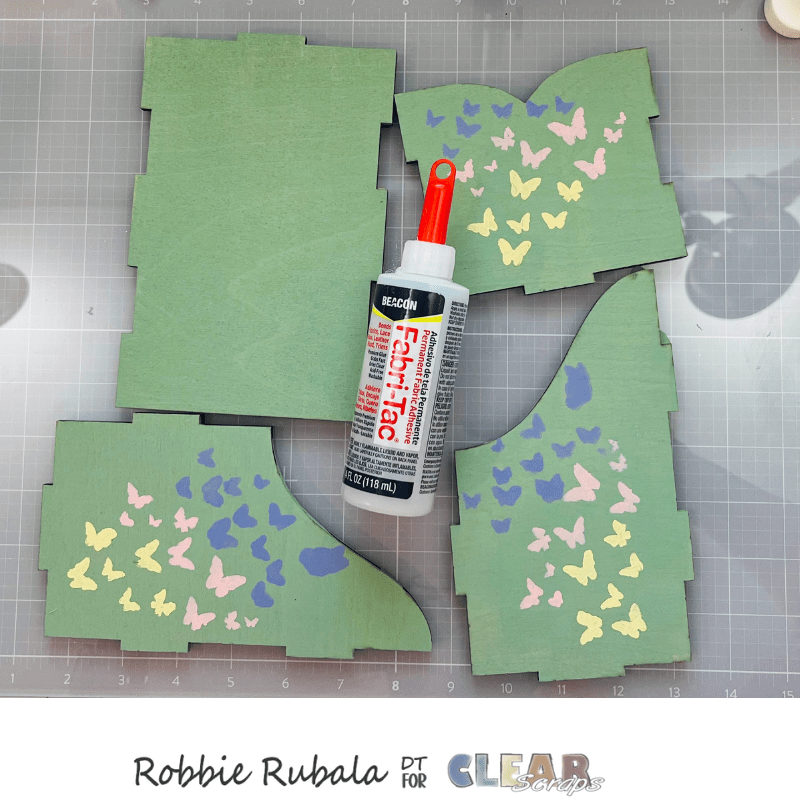
When the paint is dry use a strong adhesive to glue the box together. Set aside to dry.
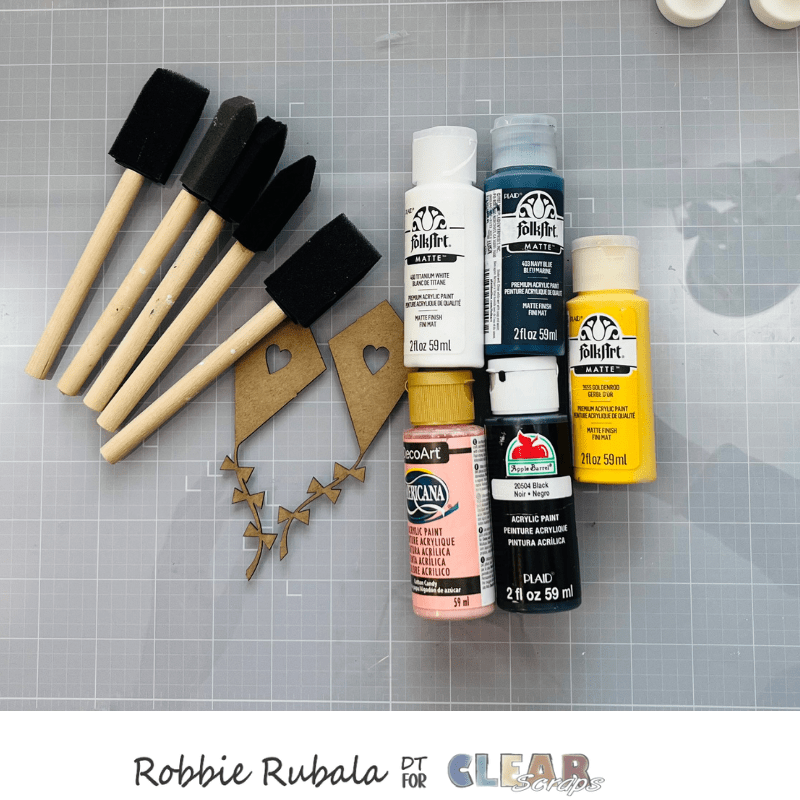
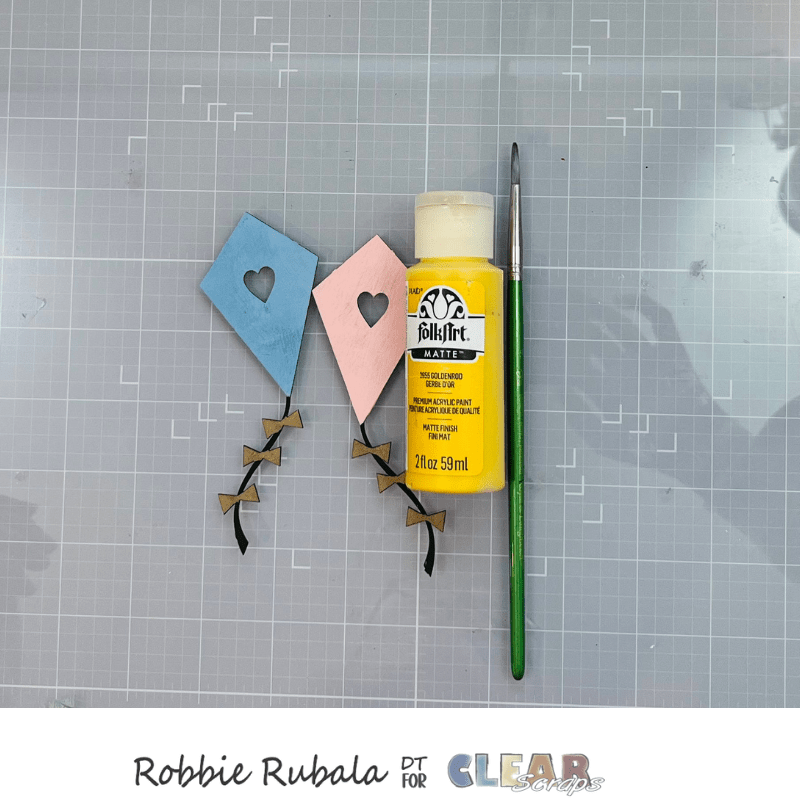
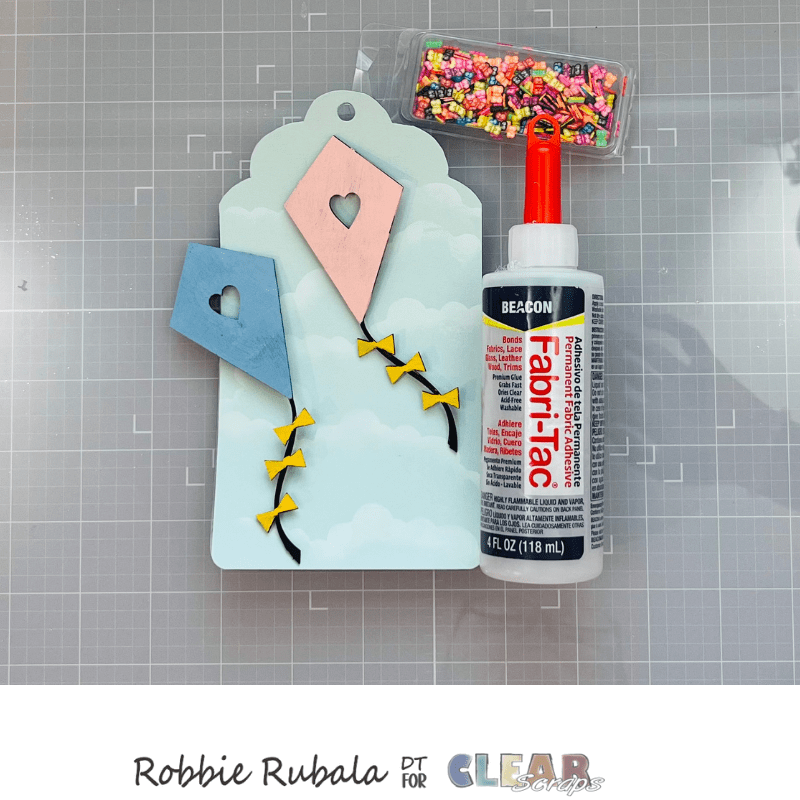
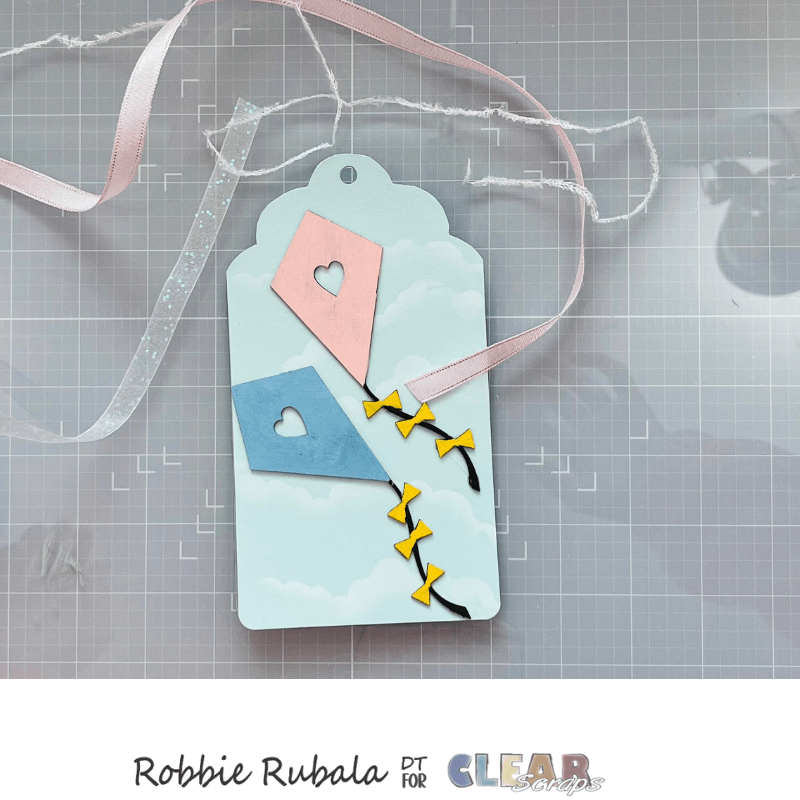
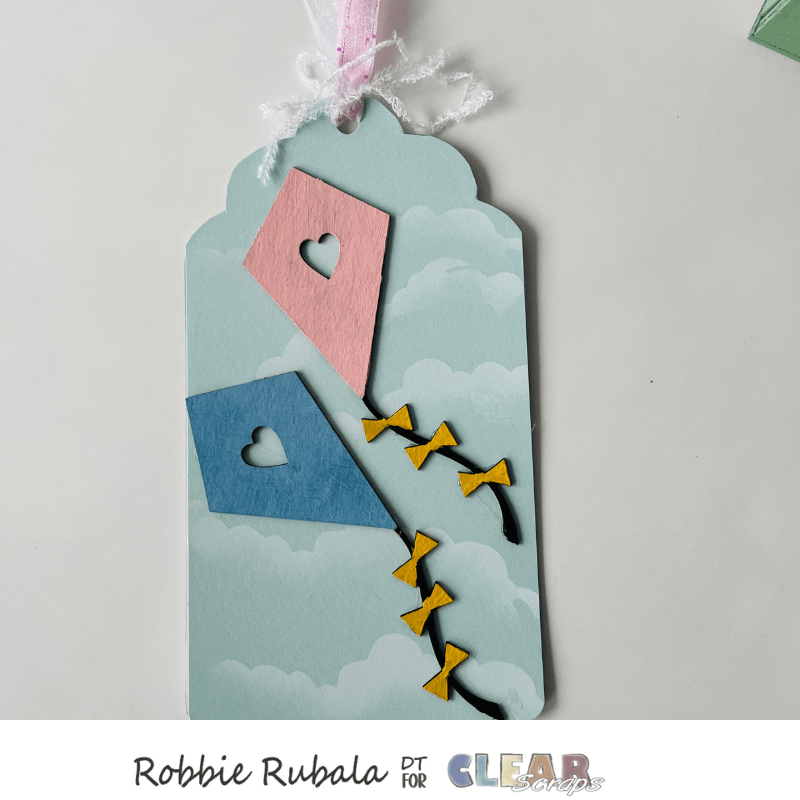
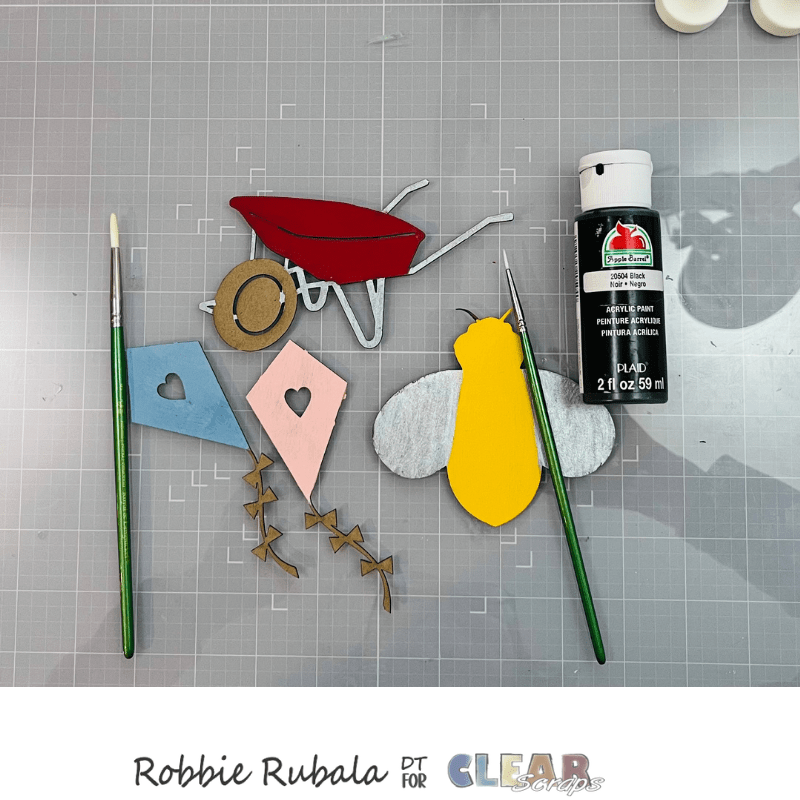
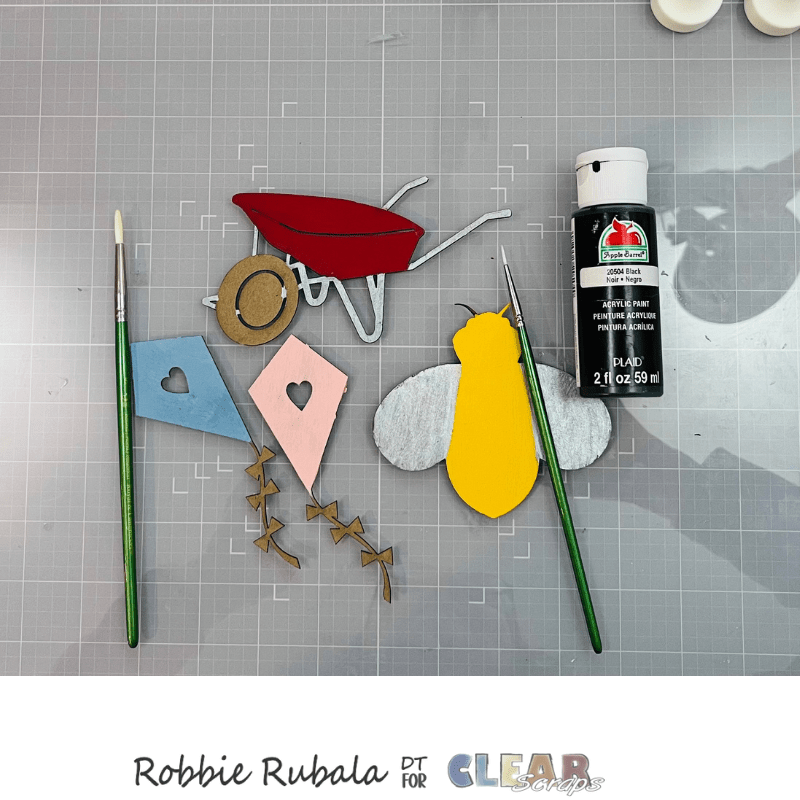
Now to make the tags. Let’s make the kites first. Take your kites and acrylic paint and paint them. Once you have them painted and they are dry, paint the bows on the tails. Use black paint to paint the string hanging from the kites.
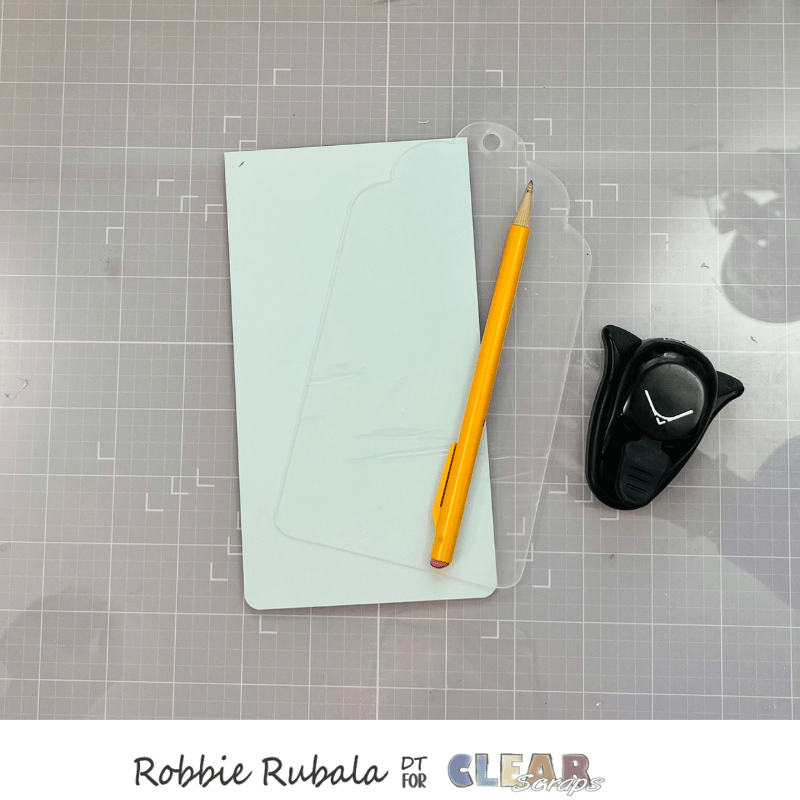
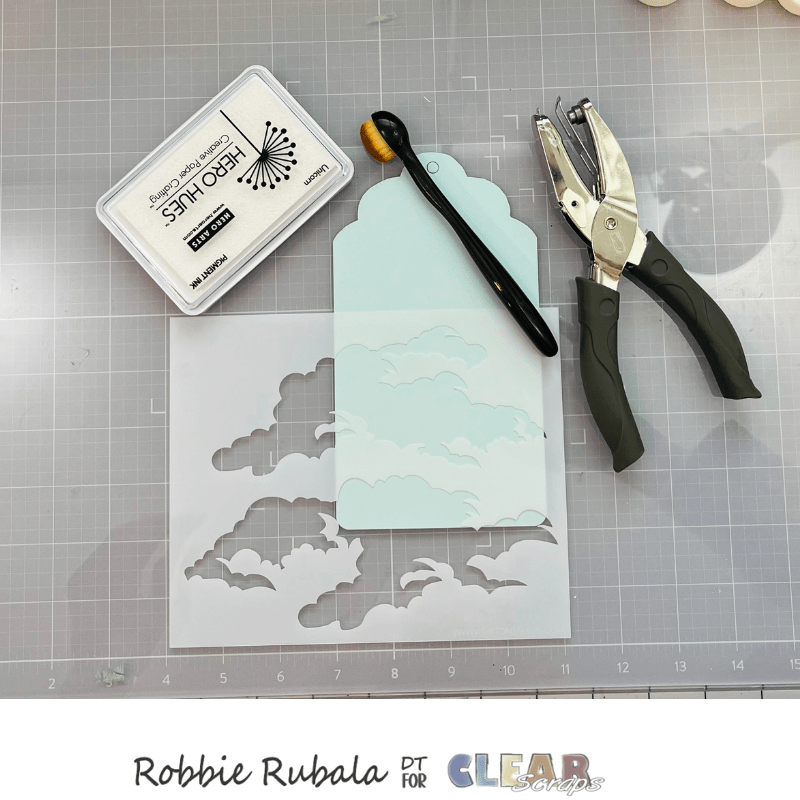
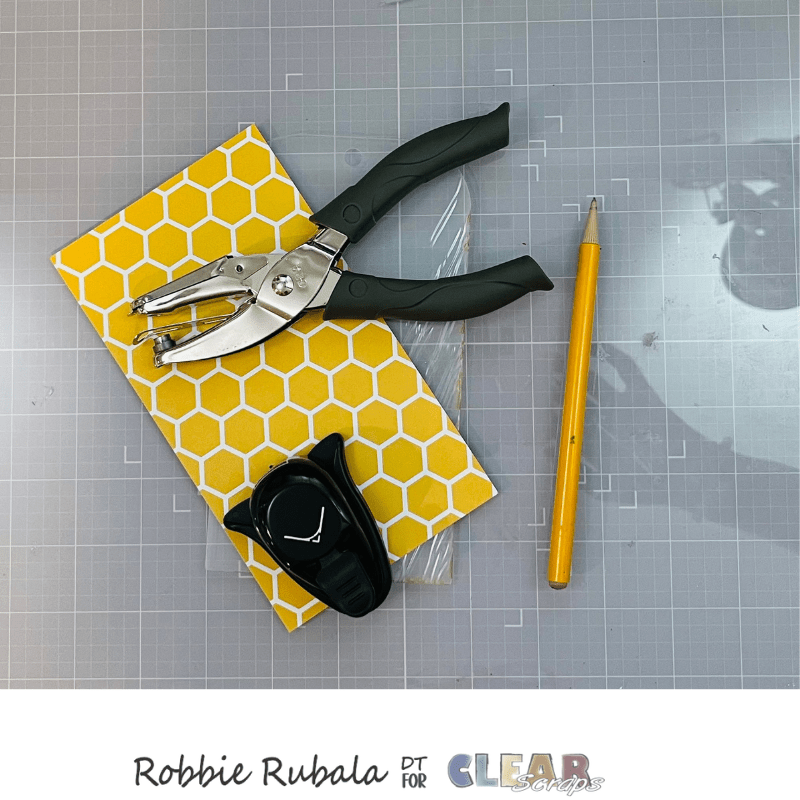
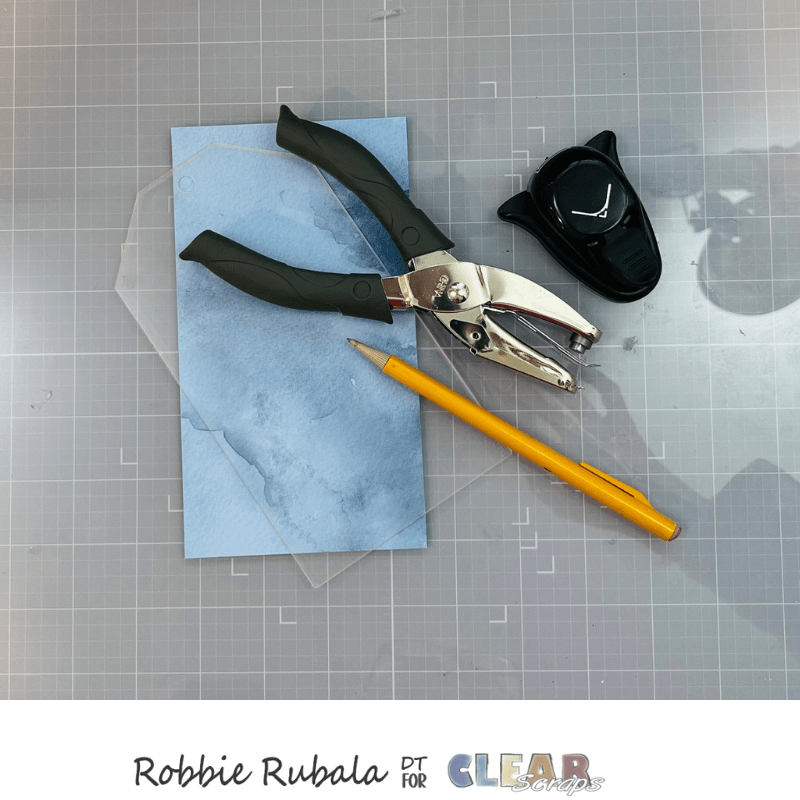
To make the tag, take one of the acrylic tags, your pattern paper ( I used a piece of cardstock and a cloud stencil to make my pattern paper), pencil and corner rounder. Trace the tag onto the pattern paper/cardstock. Make sure to trace the circle at the top. Cut out the tag and round the bottom corners. Use a hole punch to punch out the traced circle. NOTE – THIS STEP IS ONLY NECESSARY IF YOU ARE MAKING YOUR OWN BACKBROUND. Use the cloud stencil and blending brush to add clouds to the cardstock. Use a heat tool to dry the ink.
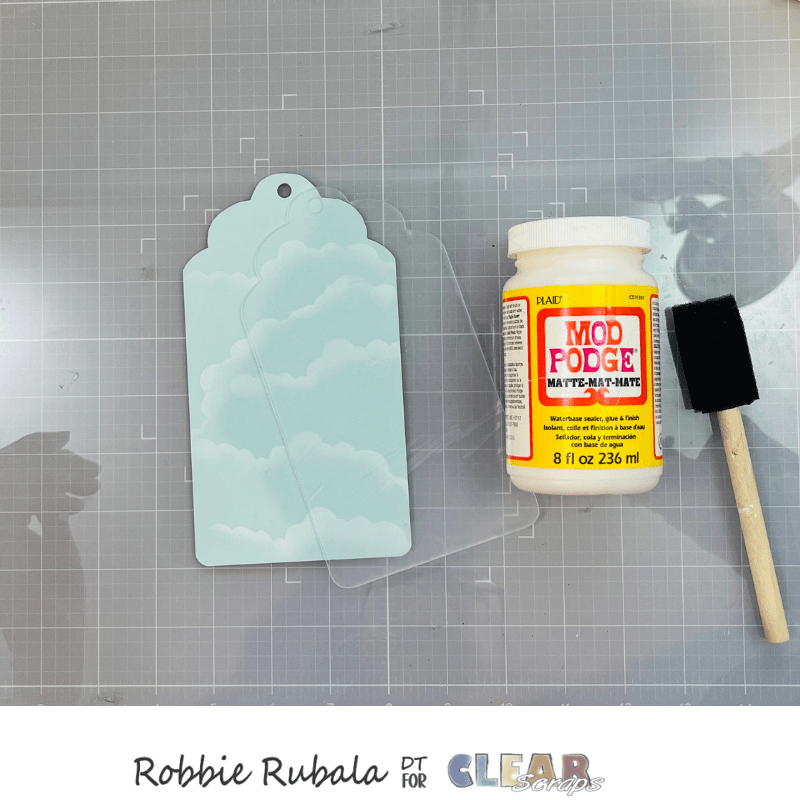
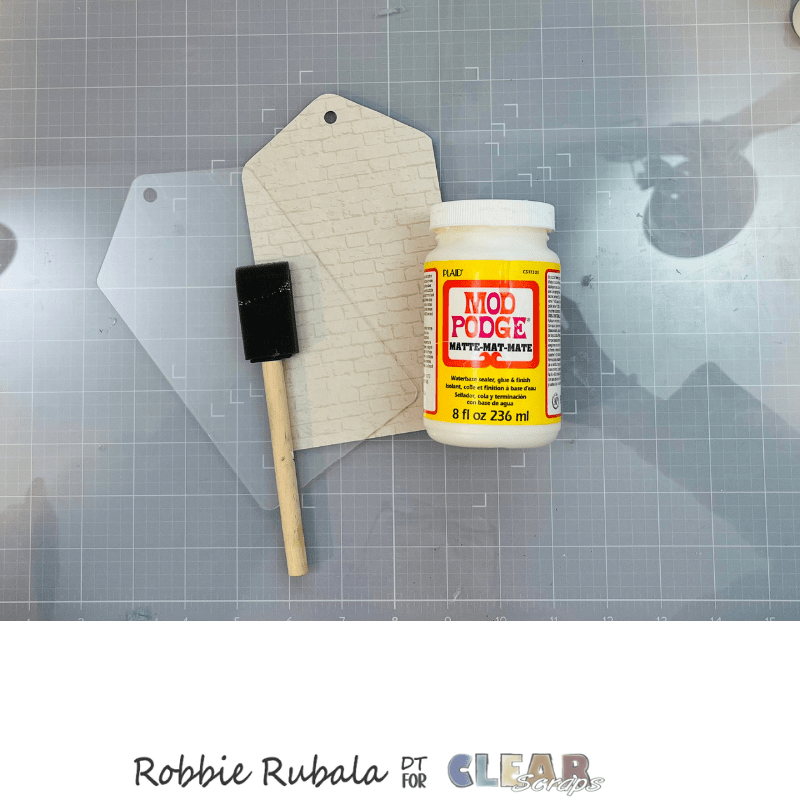
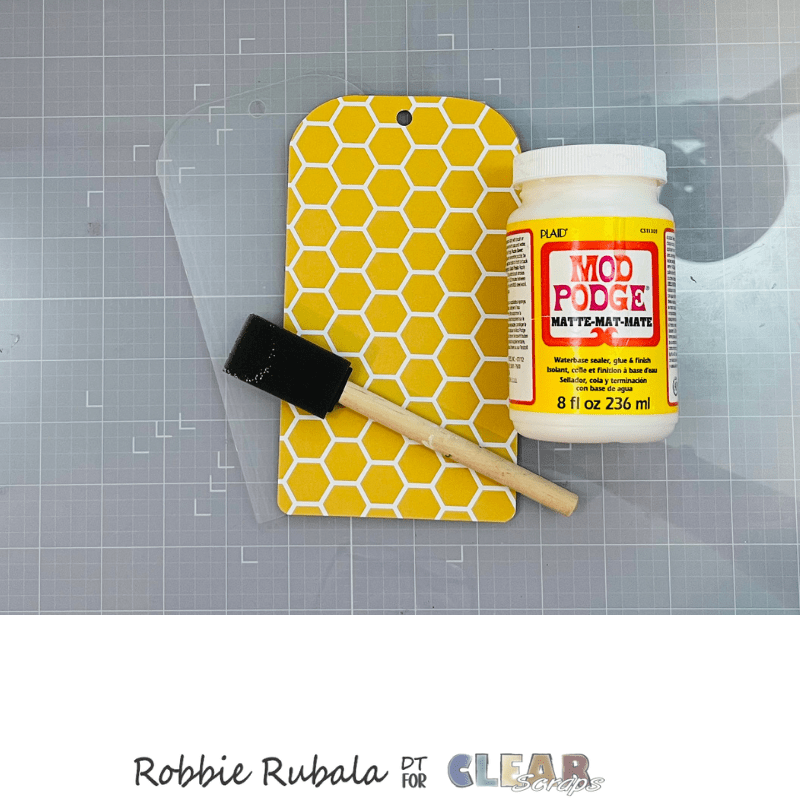
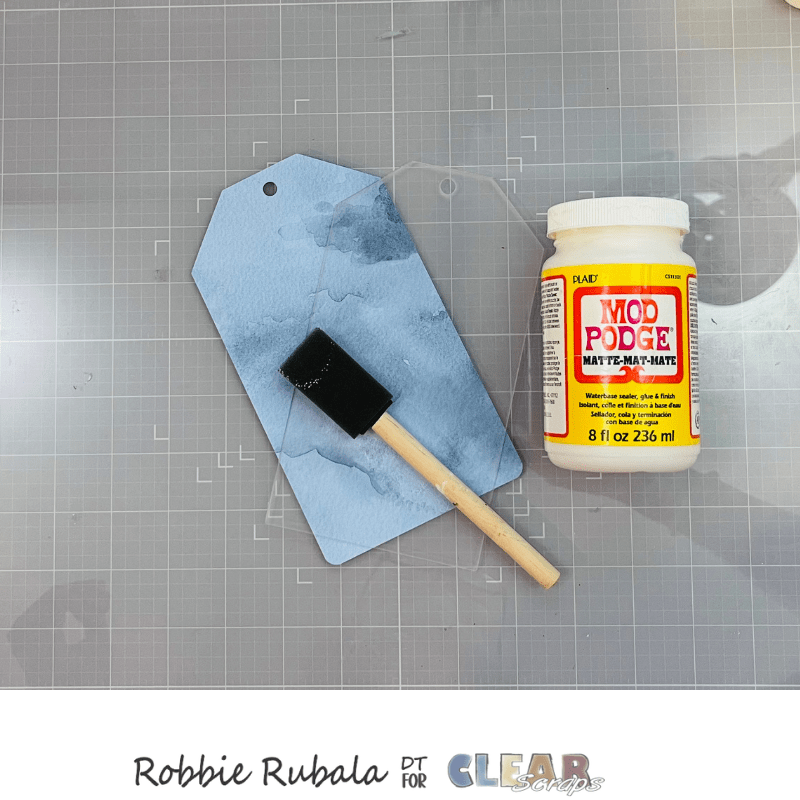
Use Gesso to attach the panel created above to the acrylic shape.
Use your strong glue to add the kites to the acrylic tag. Choose 3 ribbons to add to the top of your tag. Thread 2 of the ribbons through the hole and use the third ribbon to tie a bow at the top to hold the other ribbons in place. Tag 1 is done!
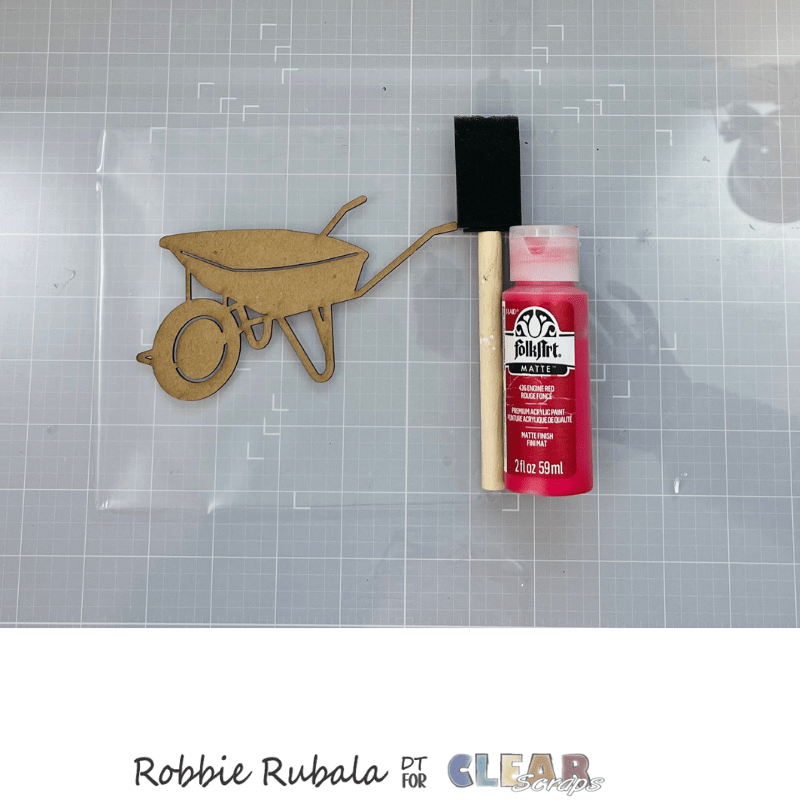
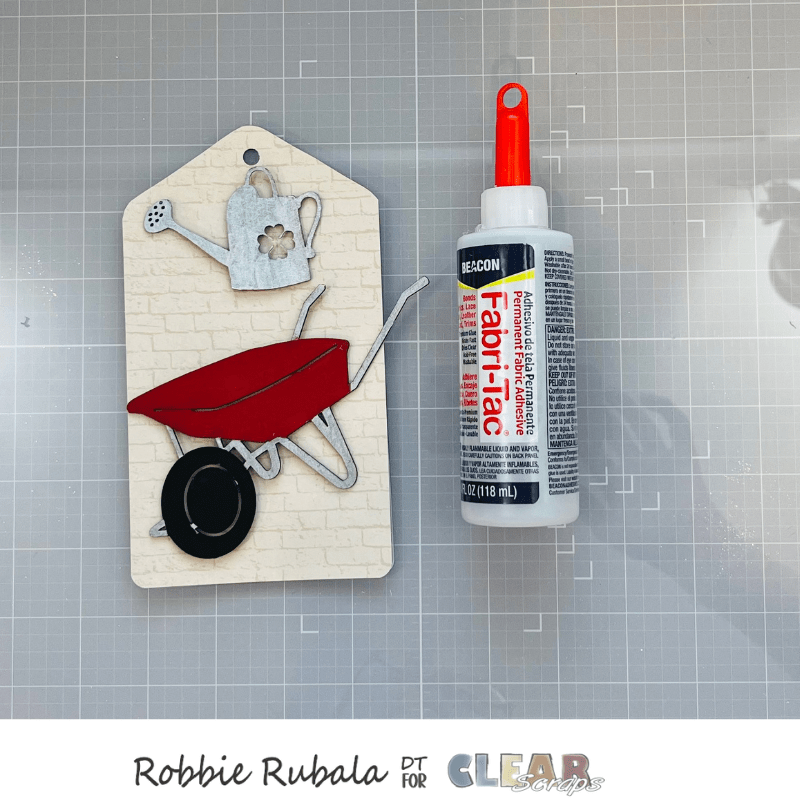
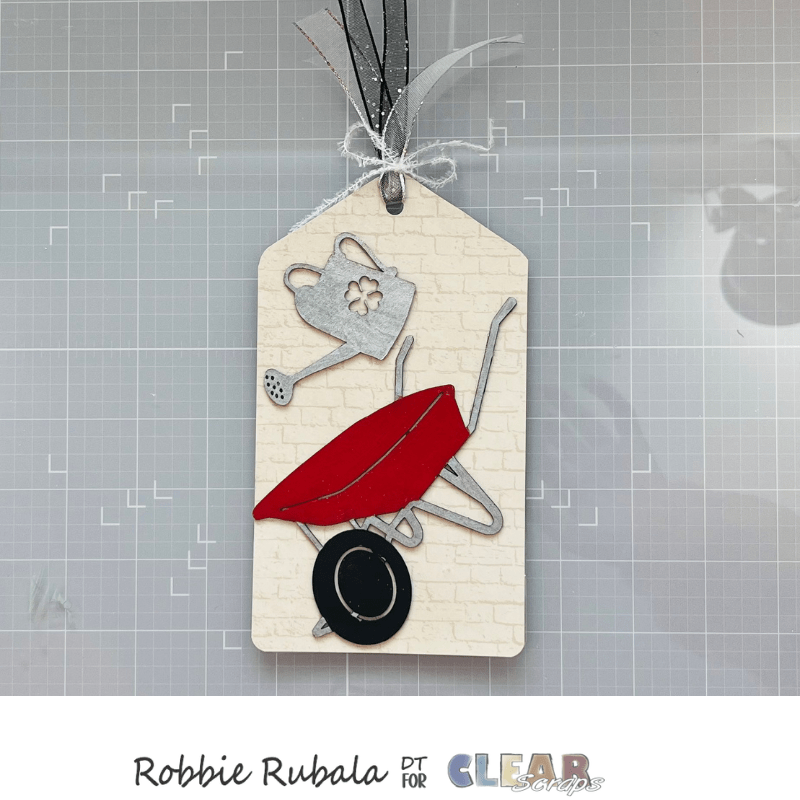
For tag 2 we will make the wheelbarrow. Take the wheelbarrow and watering can chipboard pieces and red, black, and silver paint. Paint the pieces and let dry.
To make your tag follow the same procedure as above. Trace the shape and the hole on the paper. Cut it out and use the corner rounder for the bottom corners. Add the paper to the acrylic tag using Gesso.
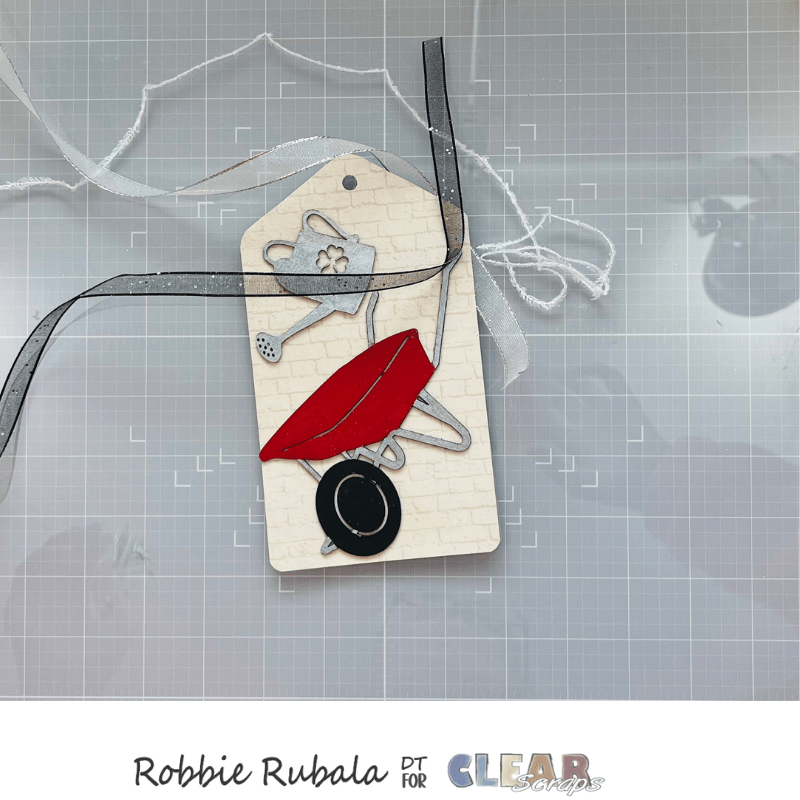
Use a strong adhesive to add the shapes to the tag. Choose 3 ribbons and add them through the hole as above. Tag 2 is complete.
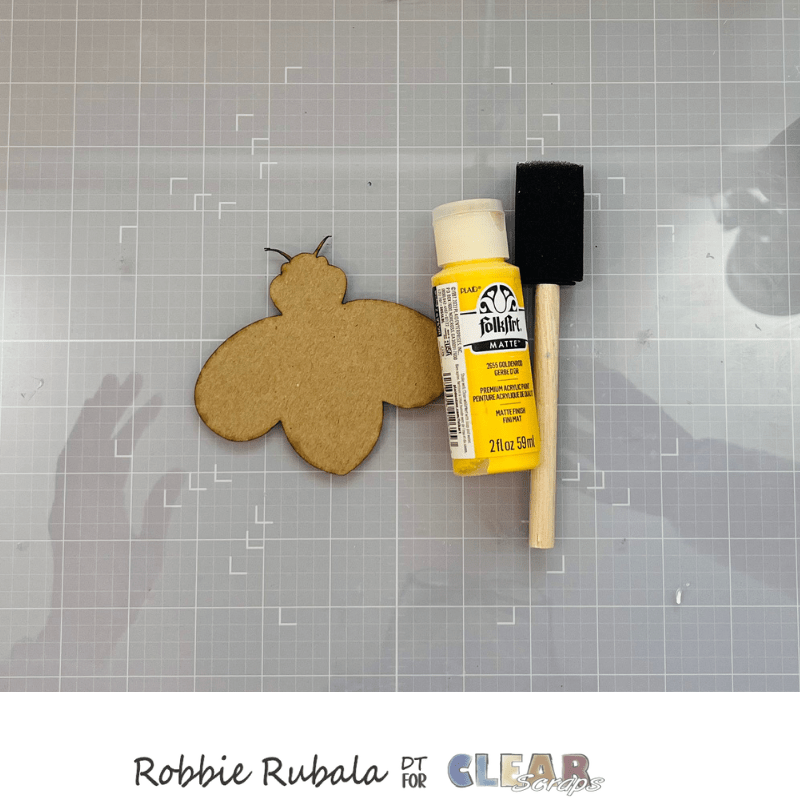
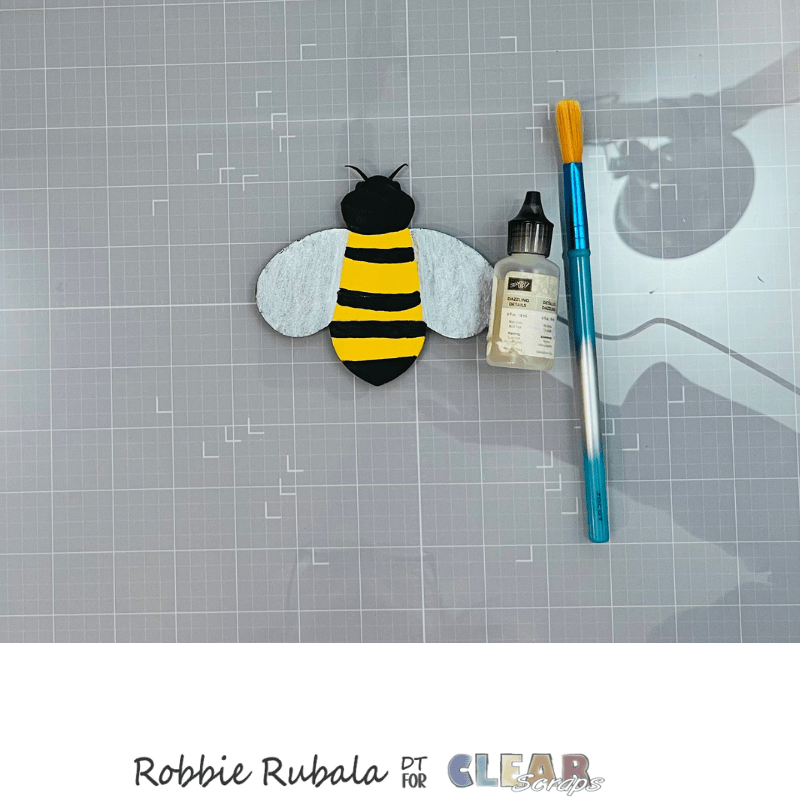
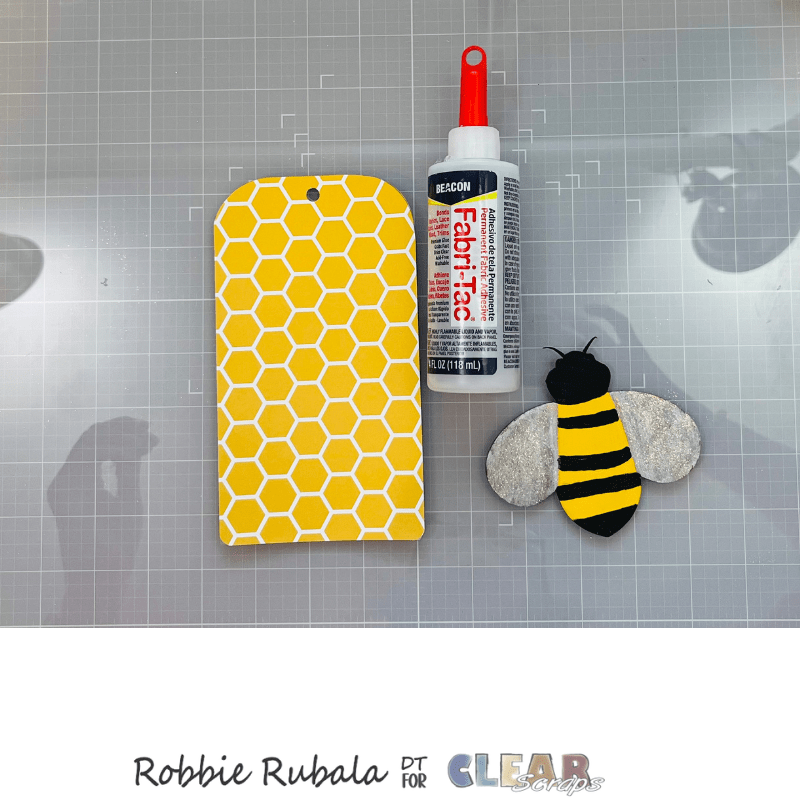
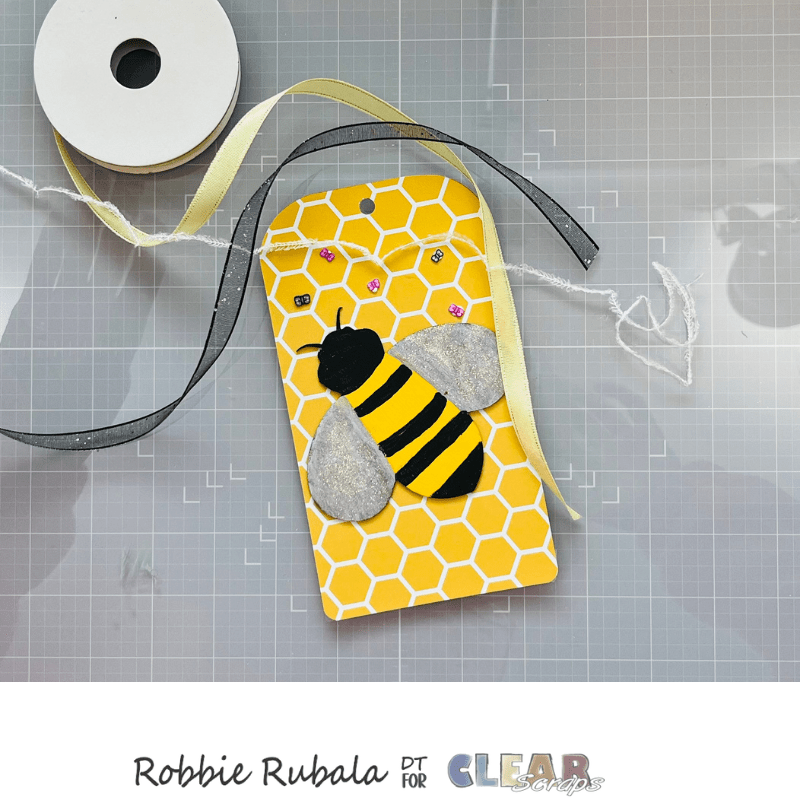
For tag 3 we will make the bee. Using yellow, black, and silver paint your bee. Let dry.
Use some form of glitter glue to add sparkle to the bee’s wings.
The tag is completed as above by tracing the shape, cutting it out and rounding the bottom corners. Add it to the acrylic tag using Gesso.
Use a strong adhesive to attach the bee to the tag. Add some of the sprinkle butterflies to the tag using glue.
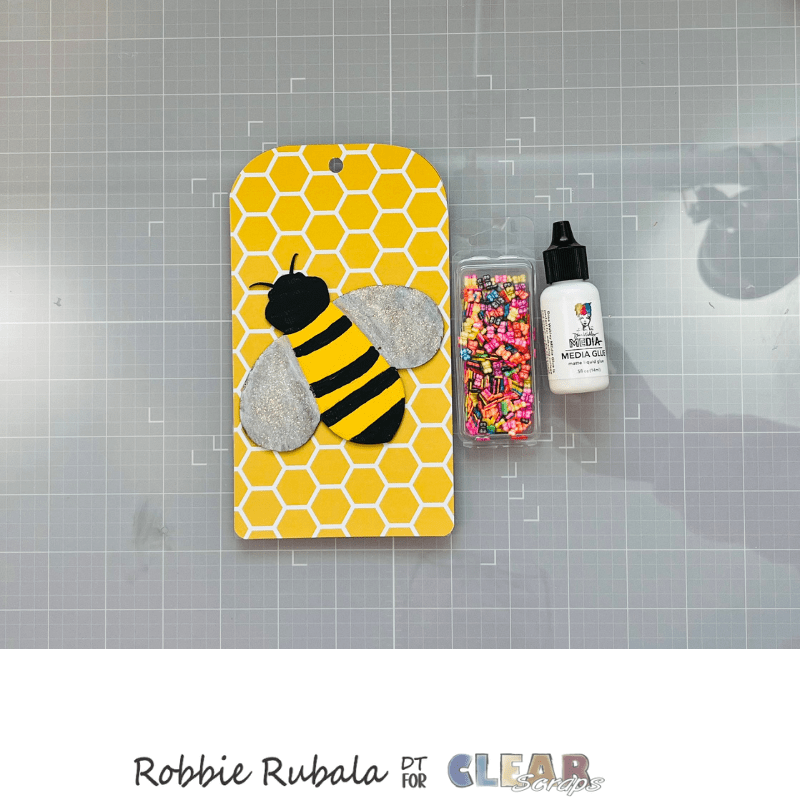
Choose your 3 ribbons and add them to the tag using the same procedure as above.

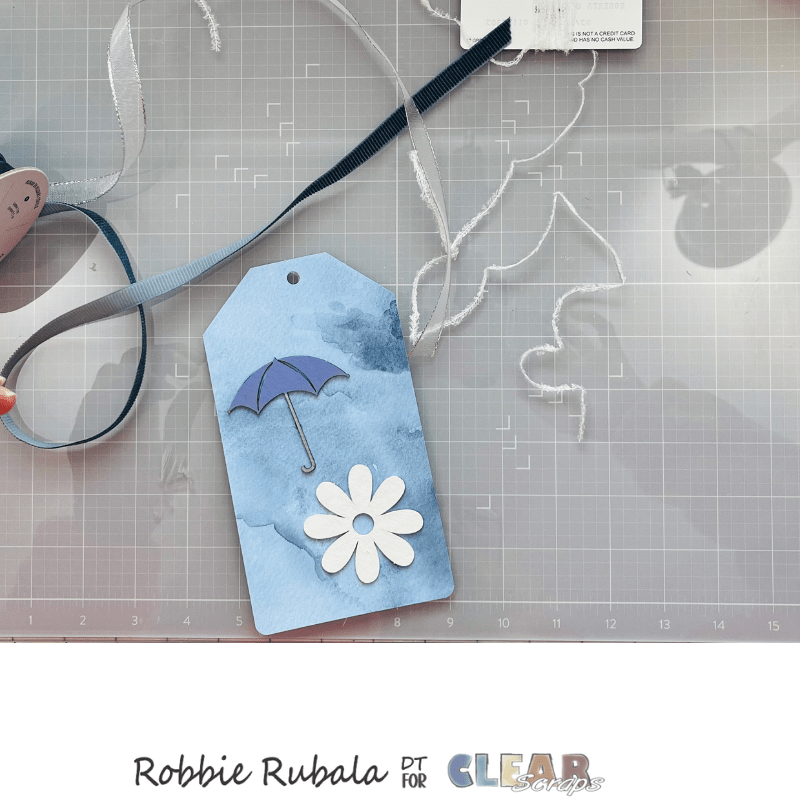
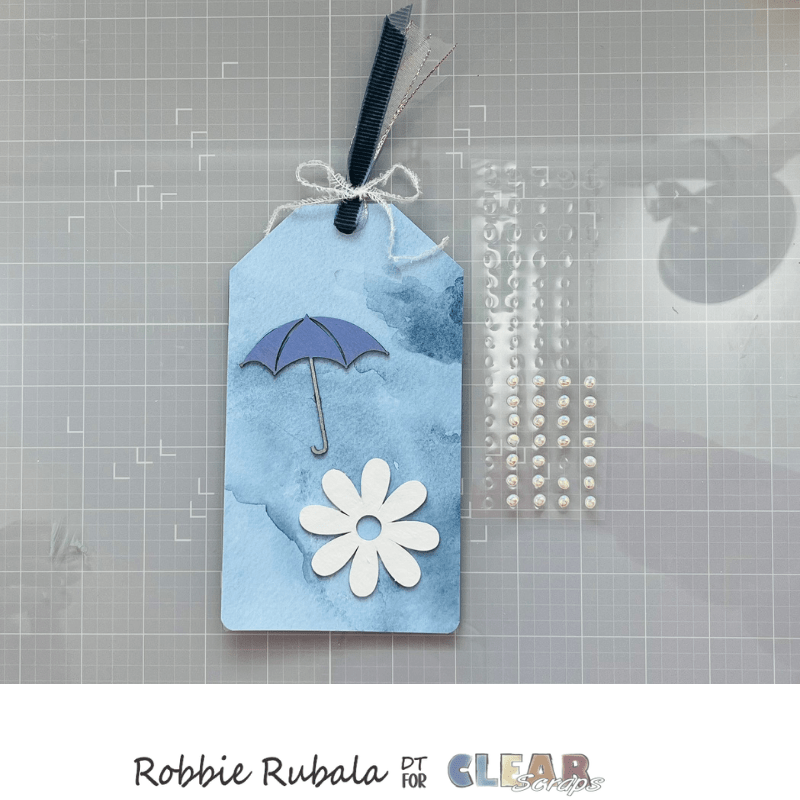
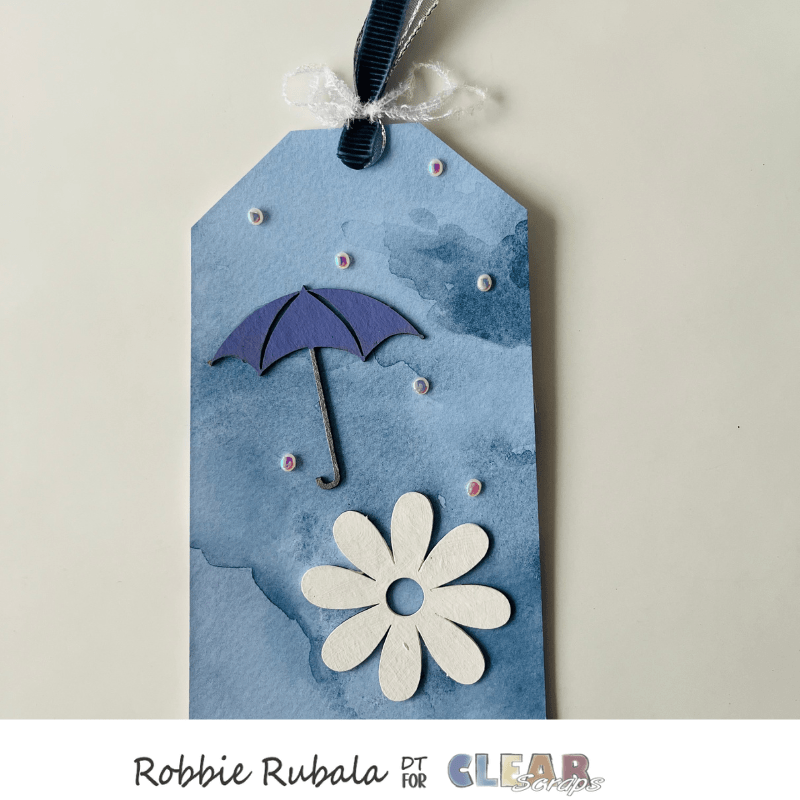
The last tag uses the umbrella and daisy flower. Paint both using blue, white, and silver paint.
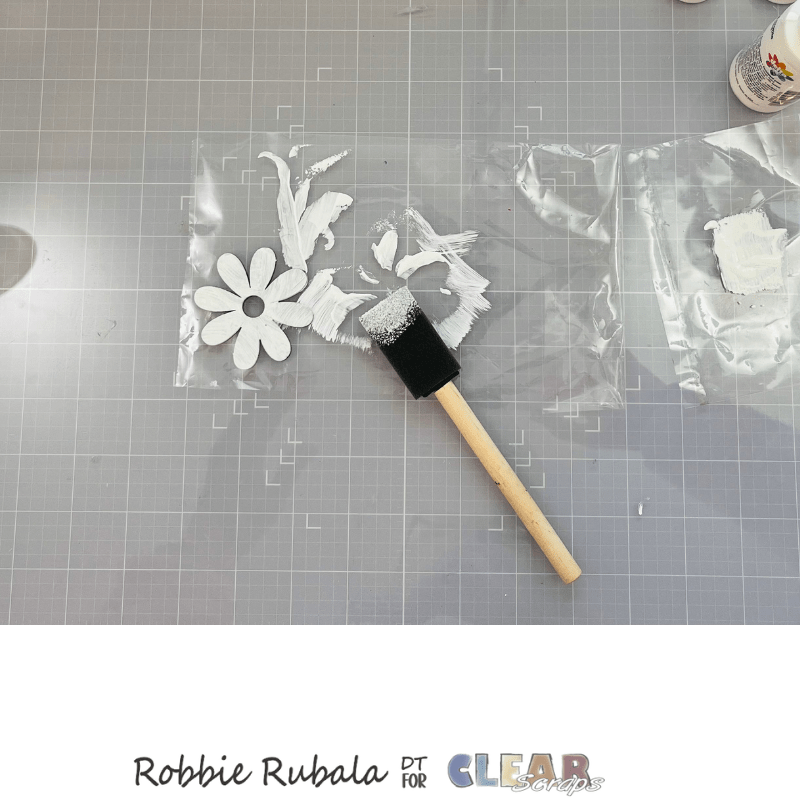
Trace your shape on your pattern paper along with the hole. Cut it out and punch the hole. Add the paper to the shape using Gesso.
Add your chipboard to the tag using a strong glue.
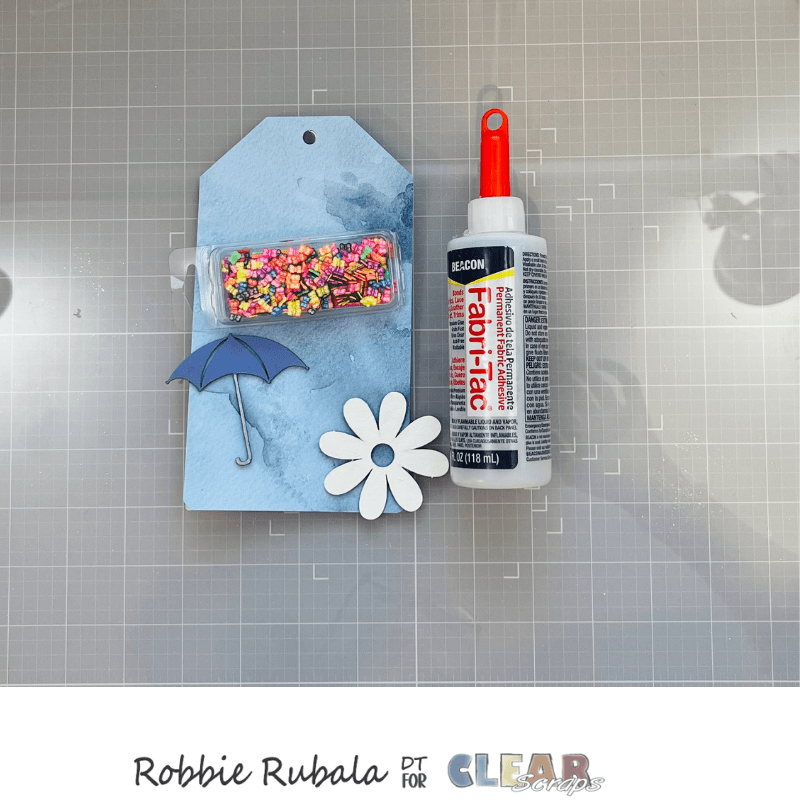
Choose your 3 ribbons. Add them as before. Choose some gems that look like raindrops. Add them to the tag.
Your box and tags are now complete and ready to put on display in your house. I hope this idea has brightened your day and that you will give it a try.


Have a Marvelous Monday!
Robbie


Leave a comment