Halloween is one of my favorite times of year to get a little playful with my crafting, and shaker cards are the perfect way to add some extra fun! Today I’m sharing three Halloween cards featuring Clear Scraps shaker elements. Each card starts with a standard 4¼” x 5½” card base, but each shaker has its own personality thanks to different papers, colors, stickers, and embellishments.
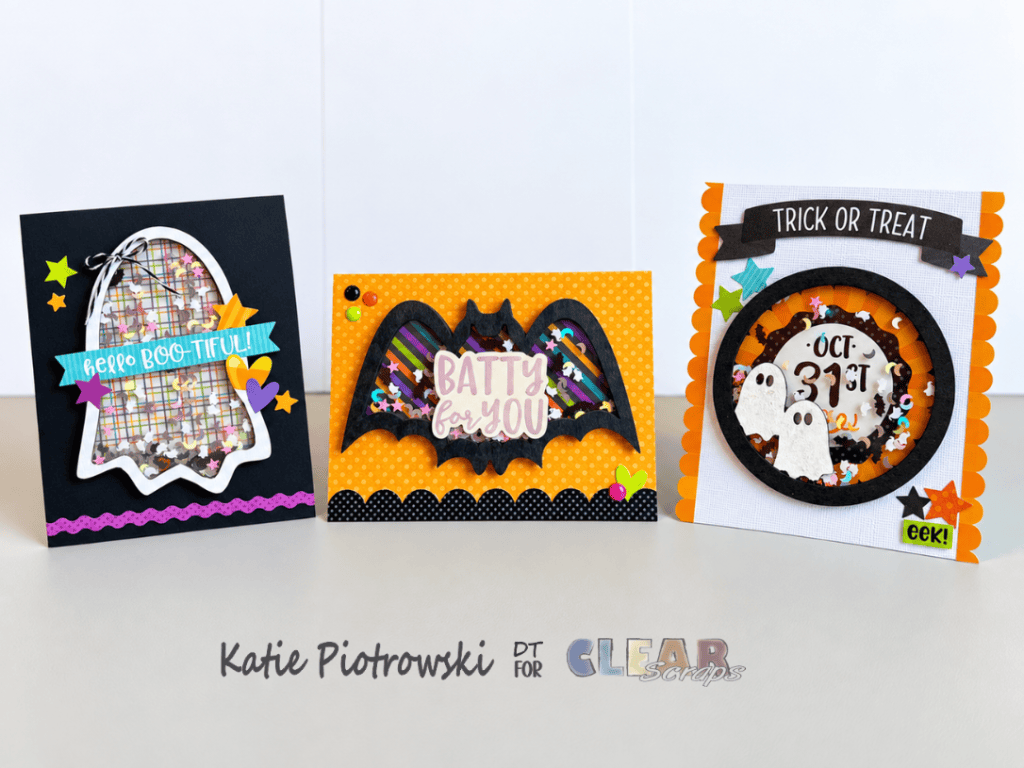
For the hello BOO-tiful card, I started with a 4¼” x 5½” black card base and the Clear Scraps Mini Shaker Ghost.
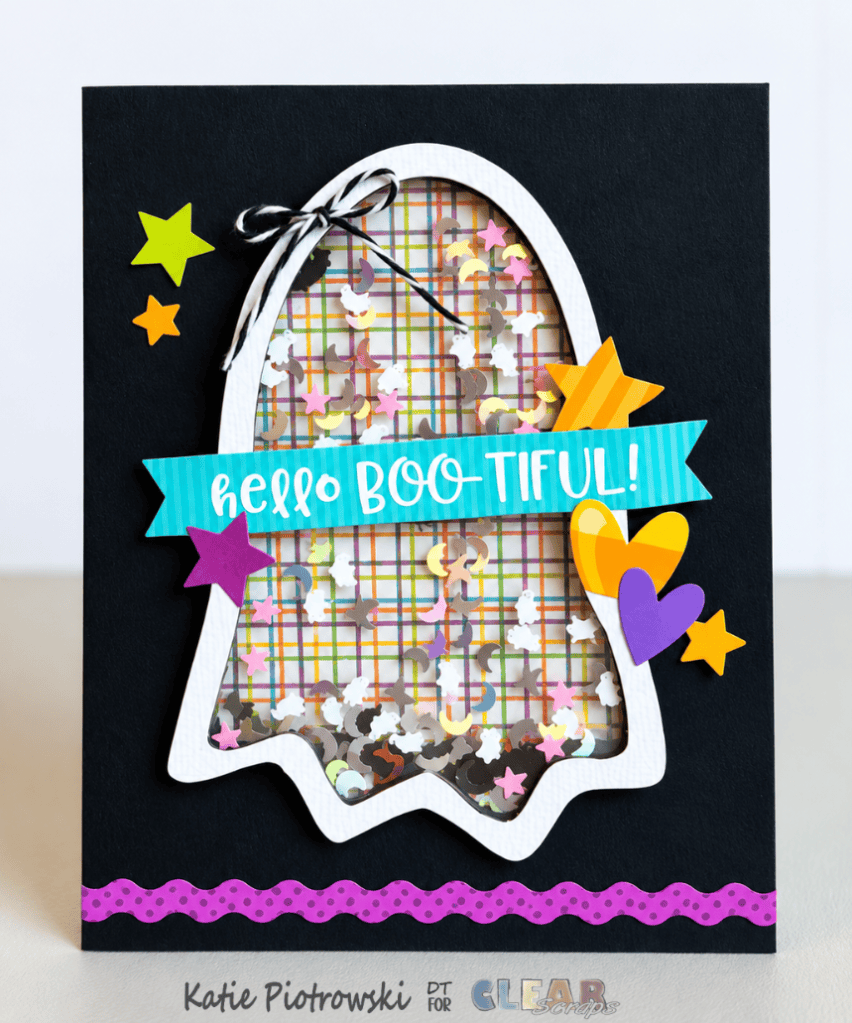
I began by adding patterned paper to the base layer of the shaker and then built up the inside walls. For the top layer, I added white cardstock and used an X-Acto knife to carefully cut away the excess cardstock around the shaker opening.
Once the shaker was assembled, I added my confetti mix inside, followed by the acrylic piece and the final white top layer. Remember to remove the protective film from the acrylic before assembling your shaker!
For the decoration, I adhered the Hello BOO-TIFUL! sentiment banner across the front of the shaker and added a few star and heart embellishments around it. After adhering the completed shaker to the card front, I added the purple ric-rac sticker across the bottom of the card and sprinkled a few additional stickers around the design to create some balance.
A small bow made from black and white baker’s twine was the perfect finishing touch. I tied the bow and adhered it near the top of the ghost.
For the second card, I used the same basic shaker construction but changed up the colors and embellishments for a completely different look. This time, I used the Mini Shaker Bat.
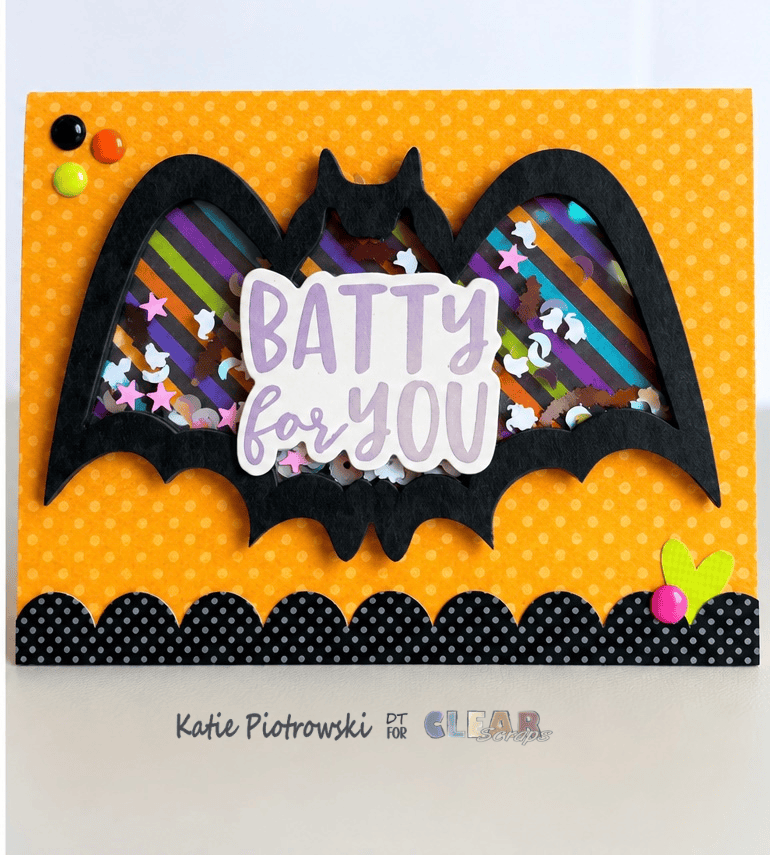
I started by adding patterned paper to the base layer of the shaker and gluing the shaker walls in place. For the top layer, I used a black acrylic marker to color the shaker frame.
After adding the confetti, I adhered the acrylic sheet and then glued the black top layer in place. I added the Batty for You foam sticker to the center using foam dots, which gives the sentiment a little extra dimension above the shaker surface.
Once the completed shaker was adhered to the card base, I added the scalloped sticker border along the bottom. A heart sticker and a few enamel dots completed the card and added just the right amount of extra color and dimension.
For my final card, I went in a completely different direction with a white card base and the Mini Shaker Circle Ghosts.
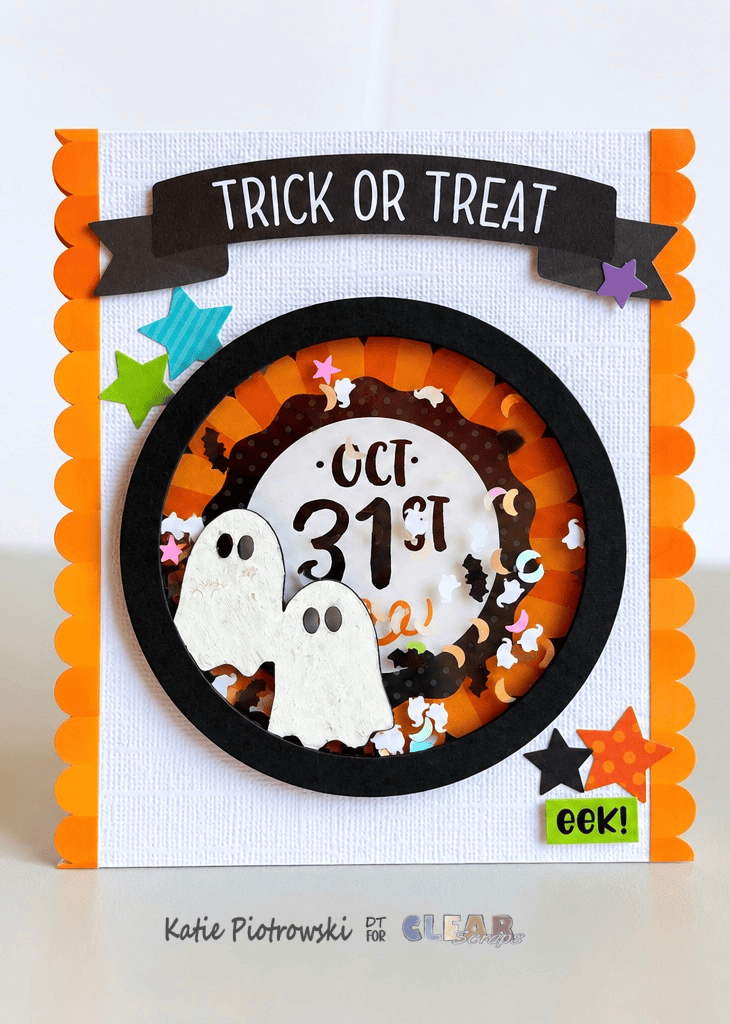
I started by adding the orange scallop sticker along both sides of the card. Next, I used a black acrylic marker to color the outer edge of the shaker base
I centered the OCT. 31ST round sticker on the center of the shaker base and then built up the shaker walls around it. For the top layer, I used acrylic markers to customize the pieces—black for the outer ring and white for the ghosts.
After adding the confetti and acrylic cover, I adhered the completed shaker to the card front.
To finish the card, I added the Trick or Treat banner across the top using foam tape for added dimension. I scattered a few star embellishments around the card to help balance the design and finished with the eek! sticker in the bottom right corner, also elevated with foam tape.
I love how each of these cards uses the same basic shaker concept but looks completely different just by changing the papers, colors, and embellishments. Shaker elements are such a fun way to add movement and dimension to handmade cards, and Clear Scraps makes it easy to customize them to fit any theme!
Clear Scraps Products Used:
What Halloween projects are you making this year?
Do you love making Halloween cards, or do you prefer using your Halloween stash for scrapbook layouts and home décor? I’d love to hear what you’re creating! Leave a comment below and share your favorite Halloween crafting project. And if you create your own projects using Clear Scraps products, be sure to share them on social media and tag @clearscraps so we can see what you’re making!
Happy crafting!
Katie


 Clear Scraps Project Post
Leave a comment